Sunday, 10 December 2017

12 Days of Christmas

I loved everything about the 12 days of Christmas Collection from Docrafts but it has taken me an age to decide how I was going to use it so it has been in my crafty stash for some time waiting for divine inspiration. In the collection were stamps, washi tape, 8x8 cards and inserts. I also had some dies and an embossing folder that went with the theme.

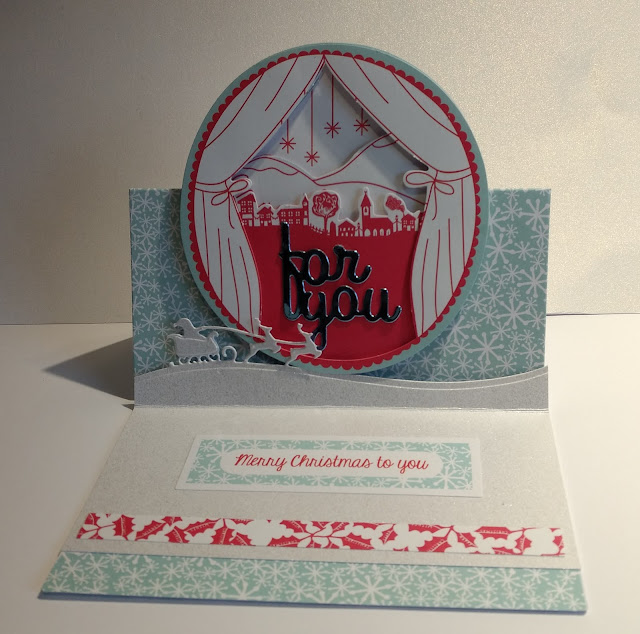
In the 12x12 paper pad where a number of 6x6 toppers which I realized fitted exactly on the Diesire fancy fold cards so an idea was formulated.  

I had a 12 days of Christmas embossing folder that I brought from Tattered Lace to use as a background on these cards.  The stamps came in handy too as I wanted something quite light as the background on the front cover.  I used my clear Sparkle pen to color in my stamped backgrounds.


and used some dies from XCut add more interest.


I added a Diesire Die for the back of the card to indicate that this would be a good place to sign the card.

Here are some more I made:


I used peeloff strips to edge the card.


 It was important to me that the inside was as beautiful as the outside.

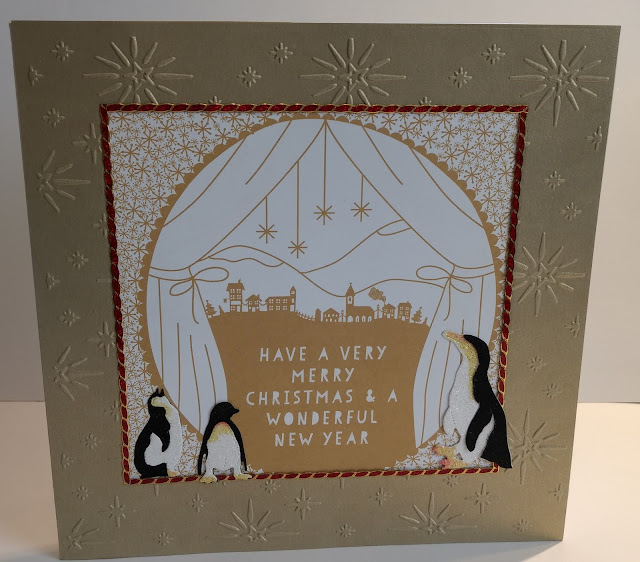
I had just brought these little penguin dies and I think they work perfectly on this card.


These were the inserts that came with the paper collection.


I put a mix of stamps on my card background.


and used a die on the inside to cut out my french hens.


These were the cards that came with the paper collection. I couldn't decide how to use them.  The first time I put card stock behind and cut out the aperture so you could see through the center.


This time I kept the center in and quite liked it.


I decorated the inside like this and decided this was going to be from me to my husband.


I put one of the toppers behind but didn't like it that much as it looks very busy.


The best effect of all was using acetate behind like this one.


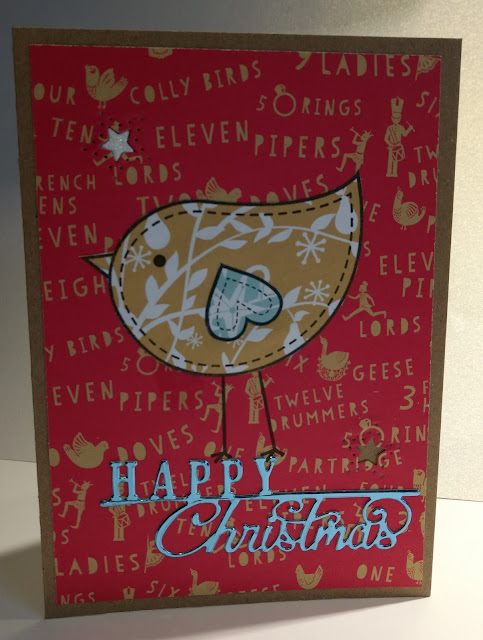
As the paper pad had large scale printing I wanted to do something quite simple so I used some Kraft Card to make the next batch of cards.  I covered the Kraft card with the paper but left a border around the edge.  Then I used a large bird stamp and stamped onto the paper and then cut this out.  I also stamped the card so that when I stuck down the bird, the legs were visible so I didn't have to cut them out, genius!

This is what they looked like:


This is my favourite bird stamp.


And here are a few cards made up with the assortment of pieces that came with the paper craft kit.


Sunday, 3 December 2017

Hunkydory - Stylish Sihouettes - A White Christmas

Over a year ago I published cards I had made using Stylish Silhouttes from Hunkydory  but like so many crafters, when we run out of ideas we tend to move onto something else and inevitably have some leftovers waiting for another day.

Well another eventually came and this is what I was inspired to make.

The first was inspired by the background that I made with Spectrum Noir watercolour inks.  These inks are very easy to use as quick washes for backgrounds.


The next few cards were made using the leftover pieces of acetate I had created with tissue paper and Pixie Powders.  I just love this technique.


And finally, a box set of cards were made.  This pretty card used for the box came from Crafters Companion.


This was really a day of crafting with leftovers!

Sunday, 26 November 2017

Crochet Penguin

Ah, doesn't it make you look forward to Christmas!

I couldn't resist trying this crochet pattern for this cute little penguin.  Actually he isn't so little as he is 7" tall.  


The pattern was found in a January 2017 edition of Love Crochet but don't worry if you can't get hold of a copy of this magazine as it is possible to get your hands on just the pattern by the designer Janine Holmes of Moji-Moji Designs in her Etsy shop for £4.79.  In fact there are a great many wonderful patterns in her store so be sure to check these out.

I found all the elements easy to crochet apart from the feet, they had me stumped for a while but I think what I created look like feet.  

Anyway, what do you think?


Sunday, 19 November 2017

Delft Blue Bookmark

The last time I did any cross stitching was many many years ago when I made a pin cushion.  Then recently I came across a great website called "SewandSo" and realised they have a really good selection of cross stitch kits and anything sewing related.

I found some cross stitch kits that were reasonably priced and thought they would be perfect to take away on my holiday.  I even got a discount for my first purchase.


I finished stitching this bookmark some time ago but never got round to putting it out with the ironing to do.  Then when I eventually got round to pressing it I thought "well I have got this far all I need to do is finish off the back".  

To adhere the felt backing onto the Aida I used some Collall Tacky Glue and glued the turned over edges down.  Then I trimmed the felt backing to fit and applied some glue to this.  Using a scrapper I was able to ensure that I didn't over do the glue so it didn't seep through.  The final job was to add the tassel and then it was complete.

I made this as a present for my mother-in-law hence the initials on it.  I hope that she likes it!


Sunday, 5 November 2017

Yupo Paper and alcohol inks

This card is made from a background I blogged about earlier in the year when I was experimenting with Yupo paper and alcohol inks.  It was one of my messy art sessions and I have only now got around to turning it into a card.

This was how I made the background.  I used a stencil and dripped the alcohol inks through the gaps and just left it to dry naturally before removing it.  It created this wonderful affect whilst leaving the outline of the stencil still visible.  

I then over-stamped the background with my pansy and leaf stamps using a white ink pad and put a sentiment in the frame.  

It feels like I have created a window to a pink sky.  Finally I mounted it onto mirri card.


Sunday, 29 October 2017

Day of the Dead

Skull fashion is still on trend and since I have a set of dies and stamps called "The Day of the Dead, I am sharing with you cards I have made using these.

The Day of the Dead is a time of celebration and remembrance of loved ones who have passed away.  It is held on November 2nd. 

During the days of the Dead, some believe that the souls of the departed return to earth to visit their loved ones.  Families visit the grave site and clean and decorate the graves with candles, flowers and then favourite foods of the deceased are placed on the graves.

The rituals used to celebrate the day are varied and colourful yet all carry the same message that celebrating the day of the dead is a true celebration of life.


Sunday, 22 October 2017

Big Birthday Celebrations

My wheelchair dance group are very excited to be celebrating the 80th birthday of one of our members this month.

I made this special card for the members to sign and I am sure the recipient is going to love it.

I have used Foundation Cardstock in a beautiful pearlescent navy card stock and have used a striplet die to create the cream background by cutting panels and layering it to produce this pattern.   The chain of flowers around the edge gives it a nice balance.  I cut the sentiment from a Crafter's Companion die.


Sunday, 15 October 2017

Love and Cherish Card

I invested in some miniature word dies from Tonic, although they are not exactly miniature, they are fabulous because they cut a background area for the words to fit on so you can have a two tone colour effect.

Here is a card I made showing off these dies.  I just want more of these but with Christmas sentiments as I really like the size as well as the two tone effect.

The fabric was decorated with glitter and then stuck onto some hessian before mounted onto Kraft Card.


Saturday, 14 October 2017

V Stitch Blanket Finally Finished

I am not sorry that I have finished really but it was a bit of drag sewing in all the ends as I would have much rather have been crocheting.  But now the ends are sewn in the throw is finished and I am really pleased with it.  Not only that, I have finished it just in time to give it to someone special tomorrow.

Here is the end result plus Misty our little adopted cat.  I counted there are 141 rows and I used a size 4 crochet hook and Stylecraft Special DK Yarn.


Close up it looks like this.  My husband likes it so much I may have to make another one!


Sunday, 8 October 2017

Blossomed Heart Corner

It's October and I am still working on the crocheted blanket I started at the beginning of August.  I am sewing in all the ends and this is quite a job.

In the craft room I am making Christmas Cards so today's blog is short and sweet.  I have made a card using Tonic Studio Essential dies, blossomed Heart Corner which I have teamed up with the Posy Pillar Strips.  These dies are so beautiful and delicate so I was very pleased to buy them in the summer sale.  The heart lends itself for inserting a picture or sentiment so I am leaving this plain until it is needed.  If you know anyone that would like a card like this, then get in touch.


Sunday, 1 October 2017

Groovi Dreams

One of my friends at work is moving onto a new job and I am so pleased for him as he started off as an Apprentice a few years back before being a PA like myself.  To mark this celebration I made the following card for him and wish him well in his new adventure.

I used some parchment paper from Clarity Stamps and a Groovi template to do the parching.  I had to pierce holes for the mandala before using my snipping scissors to snip away the background.

It took a few days to complete as it is important that you let the parchment rest between goes so that you don't overstretch it.


Sunday, 24 September 2017

Carpe Diem - Stamps by Clarity

Clarity Stamps have produced paper pads that make great bases for backgrounds.

In this example I have used some ink to make the sun and hills appear and stamped the girl and branch to complete the scene.

I used a pen to edge the cardstock so it appears as if I have mounted it onto black card stock.  I love the clean fresh look don't you?


Sunday, 17 September 2017

Tri fold card with butterfly bracket

I am sharing cards that I have made using my Cameo Silhoutte machine which gave me a chance to use some of my small card toppers.

I like the concept of unwrapping the card before you see the picture as it turns it into a gift card.

The brackets have been decorated with a product called "Hearty Soft Clay" which is lightweight and easy to transform with acrylic paints watercolour pens.  I used my Sparkle Pens on these particular ones.  The molds are from Katy Sue Designs.


I hope you enjoyed looking at these cards.