Thursday 22 December 2016

Twist and Pop Christmas Cards

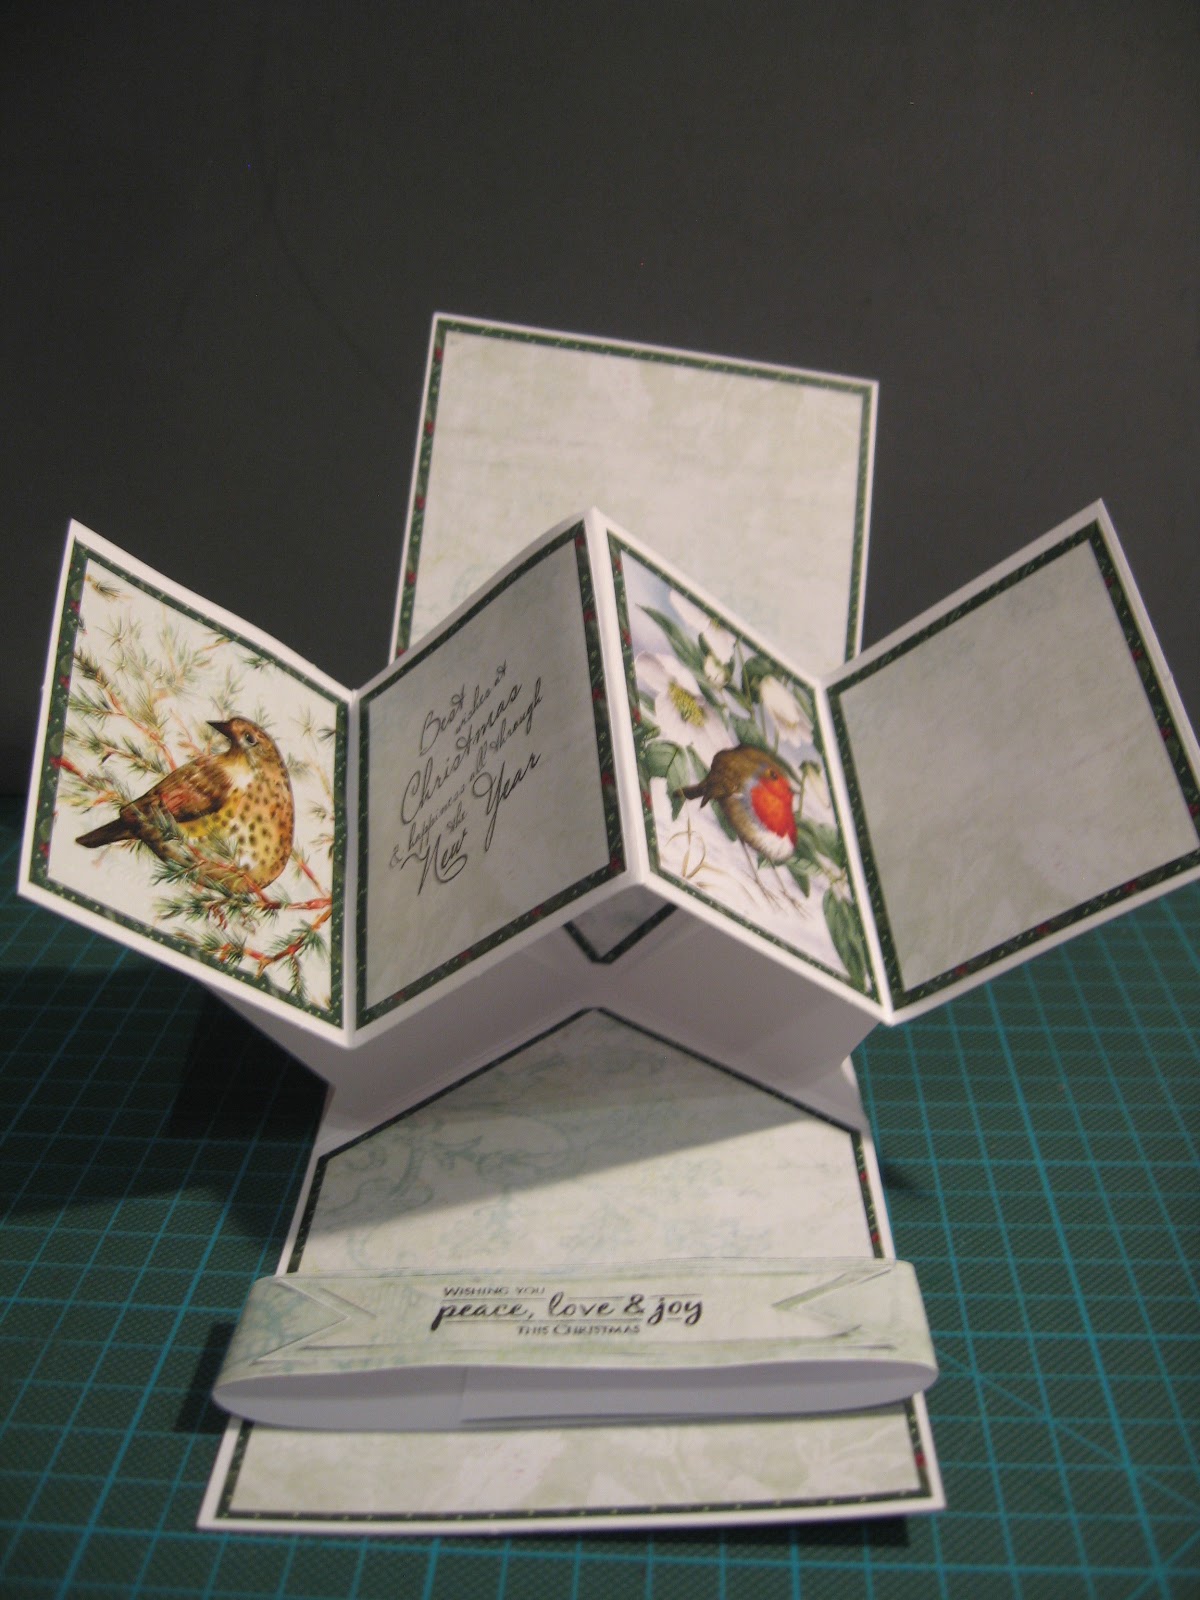
This is a new style of card that I came across a month or so back and have no idea what it is referred to as.  I thought I could make a template on my Silhouette so I could make more in the future.   They are A6 in size and fold completely flat.

I think the style must have become popular because Hunkdory have now produced a collection of these to make up.  They seem good value to. They have named them "Twist and Pop".


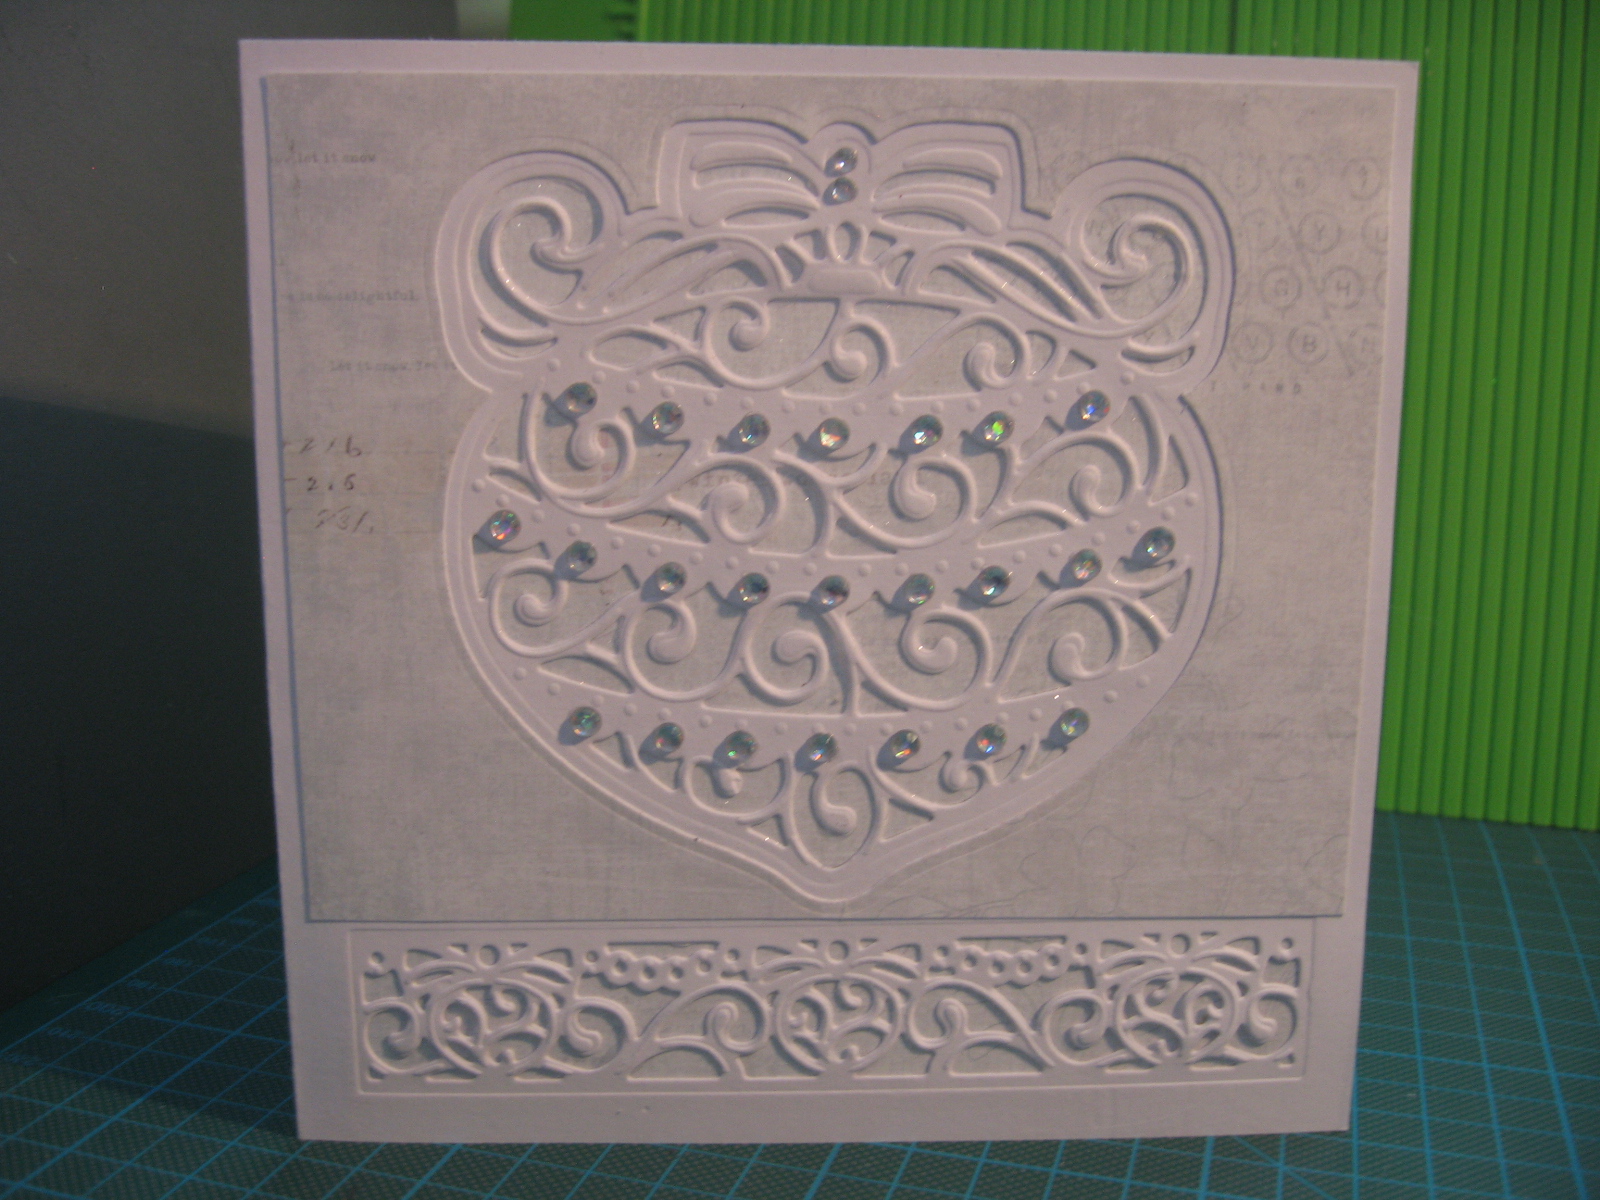
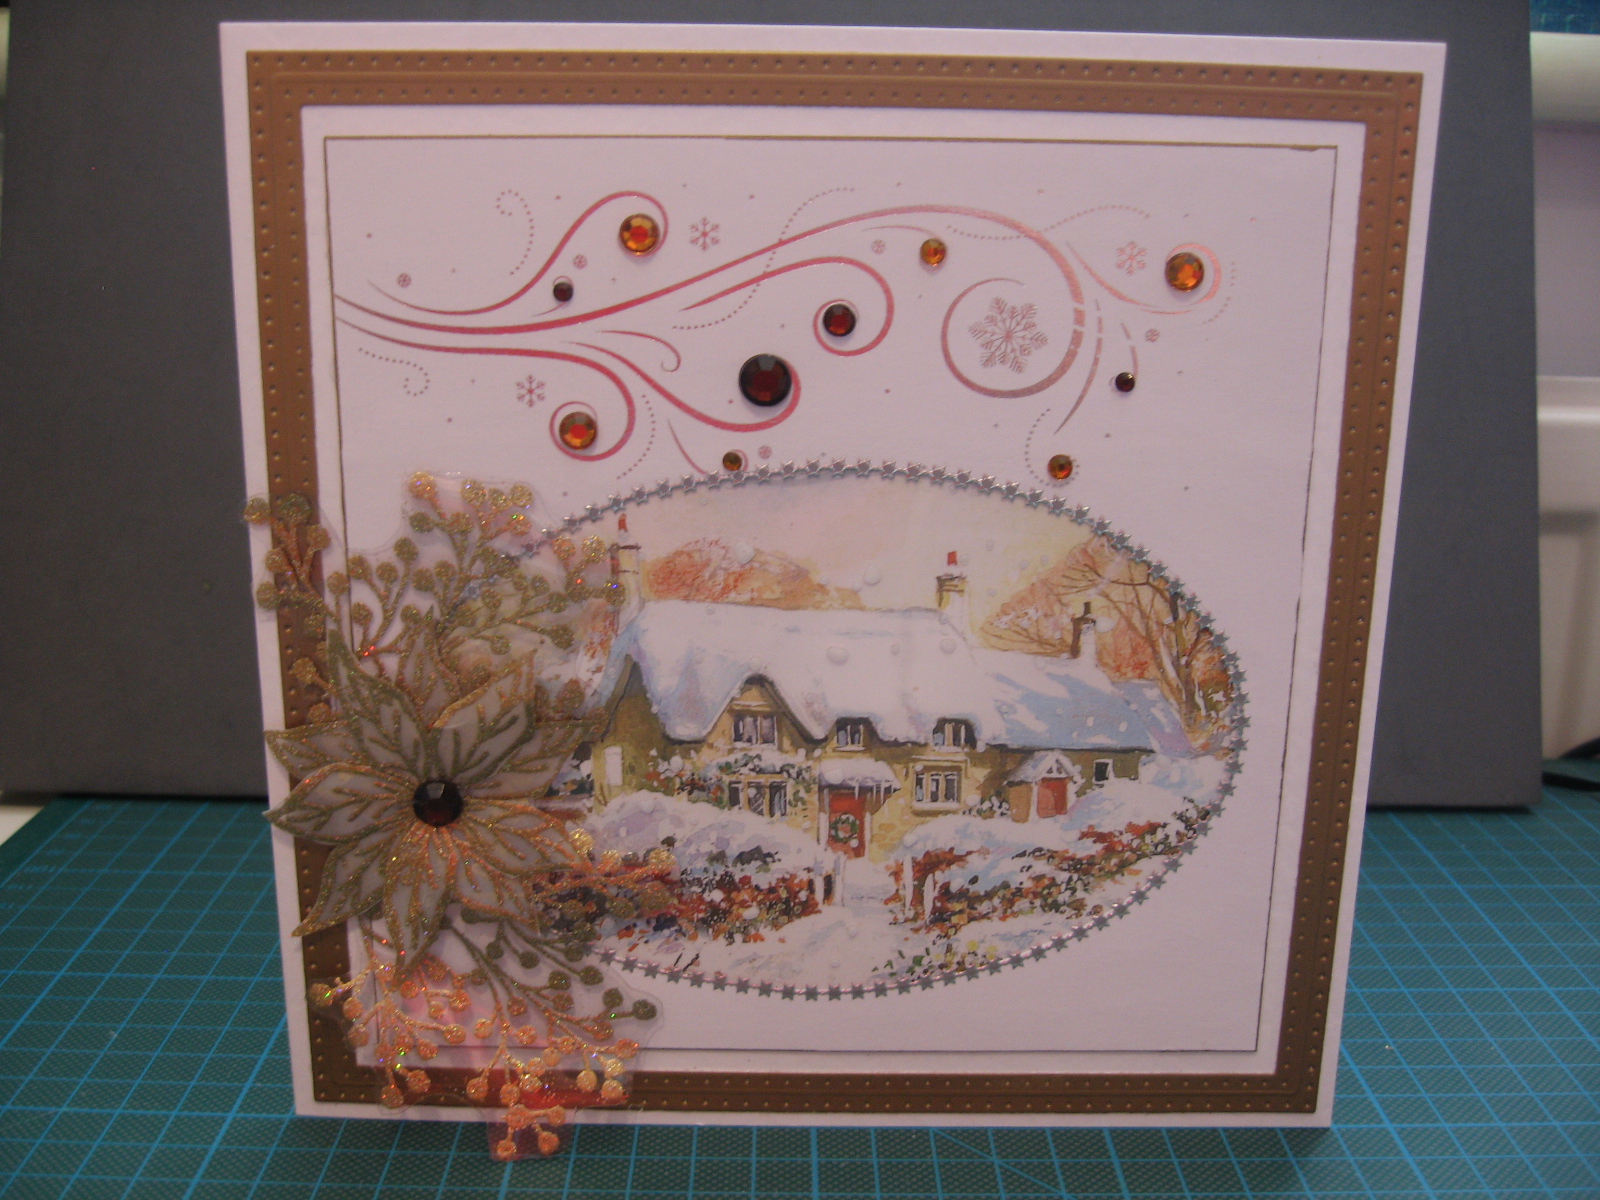
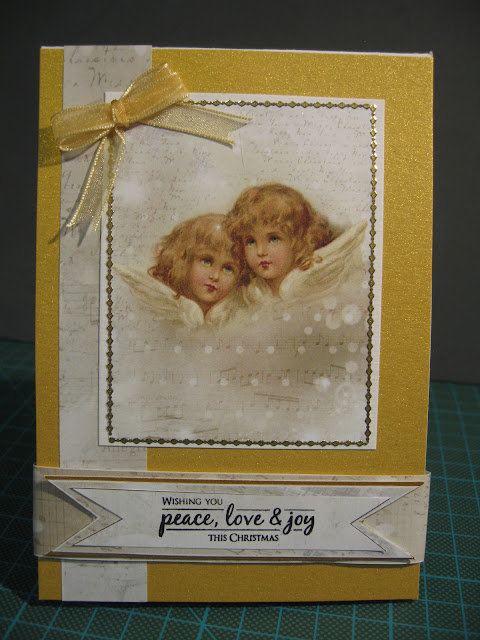
 Here are the cards I made from my collection.
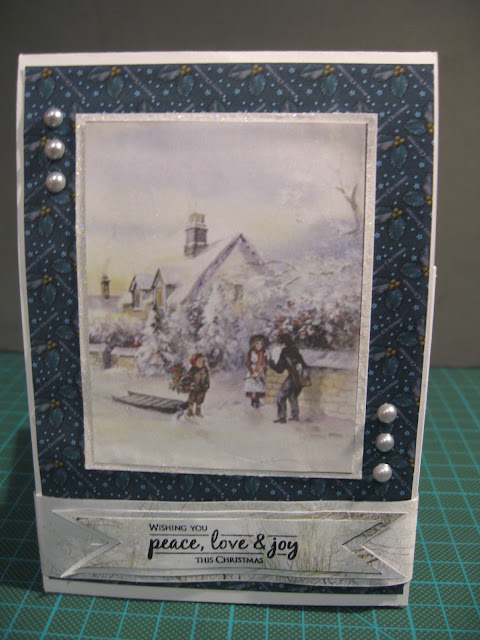


Wednesday 14 December 2016

Die'sire Create a Card Christmas "Cut in" Dies

Here is a collection of cards I have made using these dies.  I think I could do with the new Gemini as I did struggle to cut these on my Craftwell Cut "n" Boss machine.  However, I can't simply replace my Die Cutting machine for the sake of it so I shall have to be careful what cardstock I use with them as they don't particular cut well on heavy weight cardstock and this has been most disappointing. 

I don't own the complete set of eight, just these four as used in the card samples below.


I created the background template using my Cameo Silhouette so that the side panels were the right size for the small Christmas Tree dies.


I felt there was something missing from this card until I had the idea to use some vellum behind the cut out.  Now I am happy with it.


I found some dies that complimented this snowflake die in my collection.  It is likely to be a Sue Wilson die.


Another almagamation of Sue Wilson dies were used in making this card.  I prefer the decorated tree in this sample.


As you can see I put a solid background behind this die.  I am wondering if they look fine without any sentiment or maybe a little odd!


This sample doesn't have a velum background.


Or this one.  Even though I had a few problems with the cutting, it helped when I purchased a metal shim.  Off all the dies I own and despite the problems I have experienced in getting a clean cut, these are amongst my favourite Christmas dies and I hope you like them to.

Sunday 11 December 2016

Sheena Douglass - A Little Bit Festive Christmas Stamps


Stamping and colouring with inks and pens is what this collection is all about.  Here are four cards I have made with this stamp collection; each have a vintage feel and look.


Wednesday 7 December 2016

Chloe Christmas Stamps

Today I am sharing with you a few cards I have made using stamps by Chloe.  These require the use of Embossing Ink and powders.  I like working with the WOW Embossing Powders.

Some useful tips on stamping and embossing:

Be sure to use an anti-static bag over the surface of the cardstock before stamping.  This ensures the Embossing Powder only clings to the card stock where the Embossing Ink is.  Brush off any excess with a fine paintbrush or gently blowing.   

Before melting your Embossing Powder try leaving your heat gun running for a few seconds to get it warmed up.

When using your heat gun don't keep it too long in one place.  As soon as the Embossing Powder begins to melt, move onto the next area.


This last card is an inside out card.  I have used Chloe's stamps to decorate on the front along with some of the Stylish Silhouettes I had from Hunkydory.  These snowflakes were covered with silver Embossing Powder.


You get a big surprise when you open this card as you can see by the picture below.


I was thinking that I could the Die'sire Christmas 5x2 Christmas sentiments as panels on either edge.  I have seen this on sample cards and it looks amazing.  Perhaps Let It Snow and With Love would look great.

Sunday 4 December 2016

Hunkydory - Little Book of Bird Song

These postcard size images are perfect for mounting onto Mirri card and creating your own toppers.  The come in a series of mini-books by Hunkydory.  Each book contains 144 pages of beautiful quality images on 150gsm paper and are perfect for handcutting your own decoupage elements as you get repeats.

You can find the complete collection here on the Hunkydory website.  And a Click Here to get your Mirri Mats!

This is how I have used mine.  Here I have trimmed them to fit inside a frame.


You see how they can be used in different ways as card toppers.


This image is framed on two of the corners.


 The next four are cut to fit inside my favourite Spellbinders Christmas frame die.


 I am sure you will agree the images are absolutely divine.

Wednesday 30 November 2016

Christmas Snowflakes with Phil Martin

I have an adorable set of Christmas stamps by Phil Martin designed to work with Sue Wilson's frame dies. The dies come in sets of squares, circles, rectangles and oval shapes and are large so will work with your 8x8 inch cards.  They have a neat pin prick around the borders of the dies.  I was never very good at doing the pin pricks with a ruler so these dies are a godsend.  I once enquired whether these could be made and was told it wasn't possible so that shows how far the die industry has come!

Along with the Christmas stamp range there is also matching paper.  The stamp range has a border to fit nicely around the frame as shown below.  There are also sentiment stamps as well as large frame rubber stamps that are oval, round, square and retangle.  These are great quality stamps and can be found here on Phil's website.


Above is a card I have made using these dies and stamps.  I have also created one for my parents for Christmas.  I will be experimenting more with these at a later date.

Sunday 27 November 2016

Christmas Winter Wishes

I have a fab winter wreath to use with my  Cameo Silhouette.  Here I have re-sized it to fit a 7x7 card and a Tonic Winter Wishes die to add a sentiment in the middle of the card.


This second one was done in cream cardstock and a pretty blue background.


It is one of my favourites, what do you think?

Wednesday 23 November 2016

Christmas Shapeabilities Dies-Reindeer and Sleigh

Today I am sharing with you two different ways I have used two of my Spellbinder Shapeability Reindeer and Sleigh dies to make Christmas Cards.  

The first is used against a background made with an embossing folder, one of Sheena Douglass's.  I like this folder with the trees as a backdrop.  I made a frame to fit over the background using one of Sue Wilson's large frames then fitted this onto cardstock that I had embossed with little reindeer repeated over the background.


This time round I had some pretty paper with a subtle image of a house in the background.  Again, I framed the image and used my Winter Wishes die from Tattered Lace as the sentiment.


I love the crisp white look to these.

Sunday 20 November 2016

Cameo Silhouette made Christmas Cards

I have some designs from Lori Whitlock to use with my Cameo Silhouette I purchased in the Cameo Silhouette Design Store.

These were currently sized to fit a card that is 5.5 x 5.x5 which isn't a size I use so I decided to resize them to fit my existing 6x6 cardstock.  This would also mean I wouldn't have to cut a card to place the elements on as I could use my existing stock.

In order to achieve this I drew a line that was 6 inches in length.  I then grouped all the elements and resized them as a group image by placing the 6 inch line against the element that is the card template and then was able to tell when it was the correct size.

The first is "Oh Holly Night".


Followed by a happy Santa wishing you a Ho, Ho, Ho at Christmas.


  Lori called this style of card a "pop up" card but I didn't think that was what we would call it in the UK. 

If anybody knows the style of this card, please can they let me know, thank you.

Wednesday 16 November 2016

Die'sire Die - Create a Card Christmas

These are some of my favourite Create a Card Christmas dies brought out this year from Crafter's Companion.  They measure 5x5 so great for the smaller card and there are also die sentiments that are 5x2 to use with these. You can view the complete collection here.

I have found these dies cut well and can be used in a variety of ways to create different style cards so today I am sharing with you the different ways I have used them.

The first is created using two pieces of card that have been joined together by overlapping them. You can purchase cardstock for this particular style card which I am longing to get hold of although you would need to use a machine where you reverse the feed so you didn't squash the already cut and embossed design the other end!  A machine operated by hand would work or the new Gemini electric machine.

I cut both elements out onto two cards before I joined them together.  This way the embossing is equally visible on both cards.  I then cut another in blue cardstock and made it slightly larger than the area it would sit on so that it would bow forward.  The panels on the half sides were backed with blue cardstock so that the centre of the card is hidden until the moment the card is opened.  


This card shows how the die can be used in the centre of the inside of the card.


This card illustrates that some cards can be simple but equally effective with the addition of some printed cardstock stuck to the inside of the card.


Here I have demonstrated how the 5x2 sentiments work well with these dies and fit nicely together on an A5 card.  I made the wreath some time back and didn't know what to do with it.  It seems to work really well placed on this card.


The sentiment has been used underneath the Create a Card die.  I prefer it below as in this example.  I have used navy cardstock behind the white card and decorated the card to add that wintery look with snow.


Here I have used Kraftcard and die ink to highlight the edges.  I saw a card similar to this which sold the dies to me.  Kraftcard can be very effective on cards and it works particularly well in this colour scheme.


Well this is the collection to date.  Like I said I am really pleased with these dies.  The designs are clear and cut particularly well in my Craftwell Cut 'n' Boss machine.  The embossing stands out well.