I have been busy making some lovely cards with a butterfly theme. There were some concept cards in the kit which I made up first.

This one is an accordion card. It was fiddly to put together as the sides kept coming out but I did get there in the end!

This one has a lovely piece of printed vellum with butterflies on which is used on the front of the card together with a wrap with ribbon as a closure. It gave me the idea of trying this wrap closure on one of my cards.

And this one is very unusual in design. I got out my Stickles to make my butterflies stand out.
These others are what I made with the rest of the papercraft kit.


This is a new card style for me. It is a good way to use those small toppers that would get lost on a big card. I have made more like this. It was simple to make and I used a die from Tattered Lace to pin down the front corner.

This is one of Sheena's poppy dies. I didn't have red tissue paper so I used vellum.
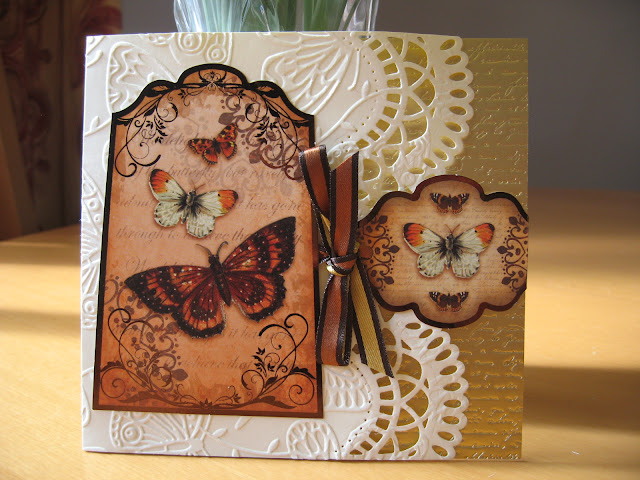
Here is the wrap and ribbon tie I designed for this card. The gold mirri card is lovely and is a Kanban product. The quality is really good.


This butterfly cardstock is so beautiful that I didn't feel I wanted to cover it up with a topper. Instead I used it as paneling down the sides of the card. I added a few flowers at the front to give it a bit of a lift.

I love the simplicity of this card. The embossing folder is a favourite of mine from Tattered Lace.

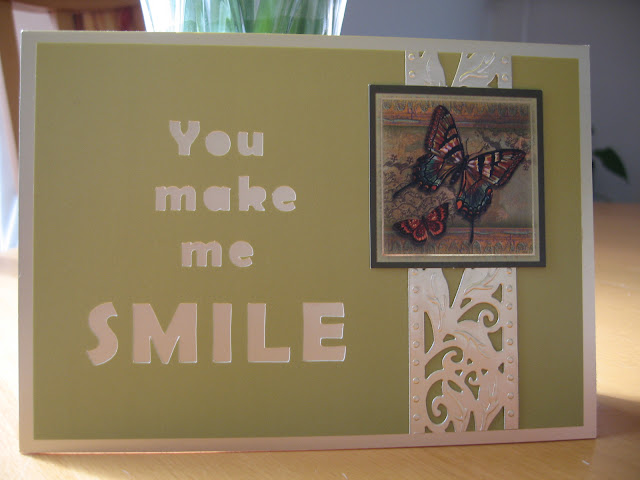
I had some letters to add down the side of this one.

Here I have cut around the edges of the butterflies so they stand out with their wings flapping.

A quick card!

And a not so quick card! This is a die from the Couture Range available at Create & Craft.


I love the freestanding butterfly on this card and colour tones.

Another.....

This was the image that made me want to own this papercraft collection. I wish I had cut around some of the butterflies though so their wings stood out. I don't feel that confident with a scapel so I didn't want to risk damaging the cardstock.

I cut this design out on my Cameo Silhoutte. I used my Sketch Pens to write the sentiment then cut it out. I then offset the outline of the sentiment to make a mount for it. So pleased to be able to combine my skills and use of the Silhoutte with my card kits.

Here I wanted to use some of the lovely printed vellum .

This was fun, I designed it on my Cameo Silhoutte.
Really liked the mix here.

I used a Sue Wilson die to add additional interest to this card. I also had a frame left over so I glued it to the background paper then I cut out some butterflies and placed them on top so it was decoupaged. I then used a further sheet of the background paper and lay this behind the topper.

These narrow toppers needed to be used somehow and work really well on top of the vellum.

If you look closely you will see that I have used my Cameo Silhoutte to cut out the sentiment on the front of this card to reveal the gold background behind.

This is a great way to use up strips of narrow card.

Another of these wrap designs only I used a butterfly to act as a closure on this one.

This is quite a masculine card so I didn't want to add a bow.

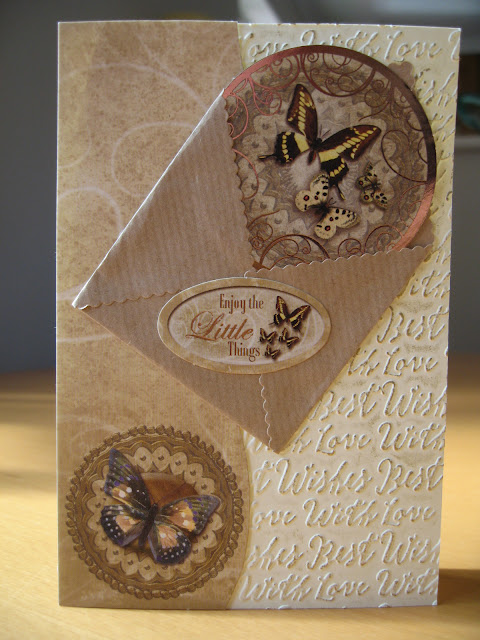
I really love the way this card stock works as a wrap around the card.

Another great card idea.

More lovely vellum.

A large easel card.

More use of these lovely flowers.


Here I cut out the butterflies to decorate this card. Do you like it, it isn't my usual style.

Can you see the gold peeping out behind the butterfly wings?
I had the idea of using my Cameo Silhoutte here to cut out the words.
Two more cards made that are tri fold with matching wraps.


and then finally the rest of the concept cards I talked about at the beginning. I must have made about 50 cards here.


It looks like I have made over 50 cards from this card collection so a good investment.

This one is an accordion card. It was fiddly to put together as the sides kept coming out but I did get there in the end!

This one has a lovely piece of printed vellum with butterflies on which is used on the front of the card together with a wrap with ribbon as a closure. It gave me the idea of trying this wrap closure on one of my cards.

And this one is very unusual in design. I got out my Stickles to make my butterflies stand out.
These others are what I made with the rest of the papercraft kit.

This is one of my favourites. I made the flower and geranium leaves from my Sheena dies. I used black card stock and rubbed Pebeo gilding wax onto them. It could be a New Home of 21st Birthday card.

This is a new card style for me. It is a good way to use those small toppers that would get lost on a big card. I have made more like this. It was simple to make and I used a die from Tattered Lace to pin down the front corner.

This is one of Sheena's poppy dies. I didn't have red tissue paper so I used vellum.

Here is the wrap and ribbon tie I designed for this card. The gold mirri card is lovely and is a Kanban product. The quality is really good.

This card was crying out for some of those black flowers of mine to finish it off.

This butterfly cardstock is so beautiful that I didn't feel I wanted to cover it up with a topper. Instead I used it as paneling down the sides of the card. I added a few flowers at the front to give it a bit of a lift.

I love the simplicity of this card. The embossing folder is a favourite of mine from Tattered Lace.

I had some letters to add down the side of this one.

Here I have cut around the edges of the butterflies so they stand out with their wings flapping.

A quick card!

And a not so quick card! This is a die from the Couture Range available at Create & Craft.

A relatively easy card to make.
I love the freestanding butterfly on this card and colour tones.
Another.....

This was the image that made me want to own this papercraft collection. I wish I had cut around some of the butterflies though so their wings stood out. I don't feel that confident with a scapel so I didn't want to risk damaging the cardstock.
I cut this design out on my Cameo Silhoutte. I used my Sketch Pens to write the sentiment then cut it out. I then offset the outline of the sentiment to make a mount for it. So pleased to be able to combine my skills and use of the Silhoutte with my card kits.

Here I wanted to use some of the lovely printed vellum .

This was fun, I designed it on my Cameo Silhoutte.

Really liked the mix here.

I used a Sue Wilson die to add additional interest to this card. I also had a frame left over so I glued it to the background paper then I cut out some butterflies and placed them on top so it was decoupaged. I then used a further sheet of the background paper and lay this behind the topper.

These narrow toppers needed to be used somehow and work really well on top of the vellum.

If you look closely you will see that I have used my Cameo Silhoutte to cut out the sentiment on the front of this card to reveal the gold background behind.

This is a great way to use up strips of narrow card.


I really love the way this card stock works as a wrap around the card.

Another great card idea.

More lovely vellum.

A large easel card.

More use of these lovely flowers.


Here I cut out the butterflies to decorate this card. Do you like it, it isn't my usual style.

Can you see the gold peeping out behind the butterfly wings?

I had the idea of using my Cameo Silhoutte here to cut out the words.
Two more cards made that are tri fold with matching wraps.


and then finally the rest of the concept cards I talked about at the beginning. I must have made about 50 cards here.


It looks like I have made over 50 cards from this card collection so a good investment.


