Friday, 31 July 2015

Divine Thoughts

I have created some cards for the celebration of a life which I would like to share with you today.  They are made using Serif Craft Artist Digi Kit called Divine Thoughts and were a commission for a friend's beloved mother who lived to be 103.  It is her funeral today and although I have never met her I think she is quite remarkable.


Sunday, 19 July 2015

Pop Up Card

I heard today that it is just 18 weeks until Christmas!  Not surprising then that crafters are happily making Christmas cards and projects.  

Today I have been making a pop up box card with a nativity scene from Tattered Lace dies.  It has been a real joy to cut out my dies with my new Spellbinders Sapphire machine.  It is perfect for those smaller dies and because of its size and weight, it is very portable.

Here is the end result and I am very pleased with it.  There is a small crib but the angle of the photograph has hidden it from view on the first image so I have taken a second.    Pop up boxes will fold flat for posting and are great fun to make.


Saturday, 11 July 2015

A Tivoli Christmas Advent Calendar

I couldn't resist the offer of purchasing a Tonic Forever Moments Tivoli Storage Unit on Create & Craft last week as they were half price.  These first came out last October and I held back then mostly due to the price and also due to lack of experience in these types of projects.    Although useful as a storage solution for those smaller things that seem to get lost in big drawers, the reason for my purchase was to make this work as an advent calendar, something I had always aspired to owning.  Christmas feels that much more special when you fill your home with lots of homemade items.  However, I can see me making use of this all year round if I turn the drawers around and add little drawer handles.

The actual unit is constructed from mdf which simply slots together.  All you need is a little bit of glue which is provided with the project.  I took the advice of leaving off the back panel until I had applied a couple of coats of paint onto the mdf.  This prevented pools of paint forming at the back and was much easier to paint.  I painted the back piece separately and then fitted it on when the paint was dry.  In normal circumstances I would save the painting to last because of the risk of the mdf swelling and then joints not fitting but this didn't seem to be a problem and I was careful when applying paint need the joints.

The drawers are made up of strong cardboard pieces which are ready to glue together and decorate as you wish.    Again, I painted these first before construction to make it easier.  It is surprising how long it takes to apply two coats of paints twice over on 24 little drawers!  Still, I had the TV on in the background which kept me company.  I then sealed my drawers with some Modge Podge to protect from wear and tear before gluing the corners together. 

Finally I decorated each drawer front with paper I had from my Mind’s Eye and numbered them 1 to 24!

Here is a photo of the finished result.


Saturday, 4 July 2015

Stencilling

This past week or so I have been looking at new ways of making my cards by using stencils, paint and watercolours.

My inspiration has come from well known artist called Sheena Douglass.  Sheena is a favourite amongst us who watch the Create and Craft shopping channel as she demonstrates that with the right tools and equipment, anyone can be an artist even, if like me, you find it difficult to draw!

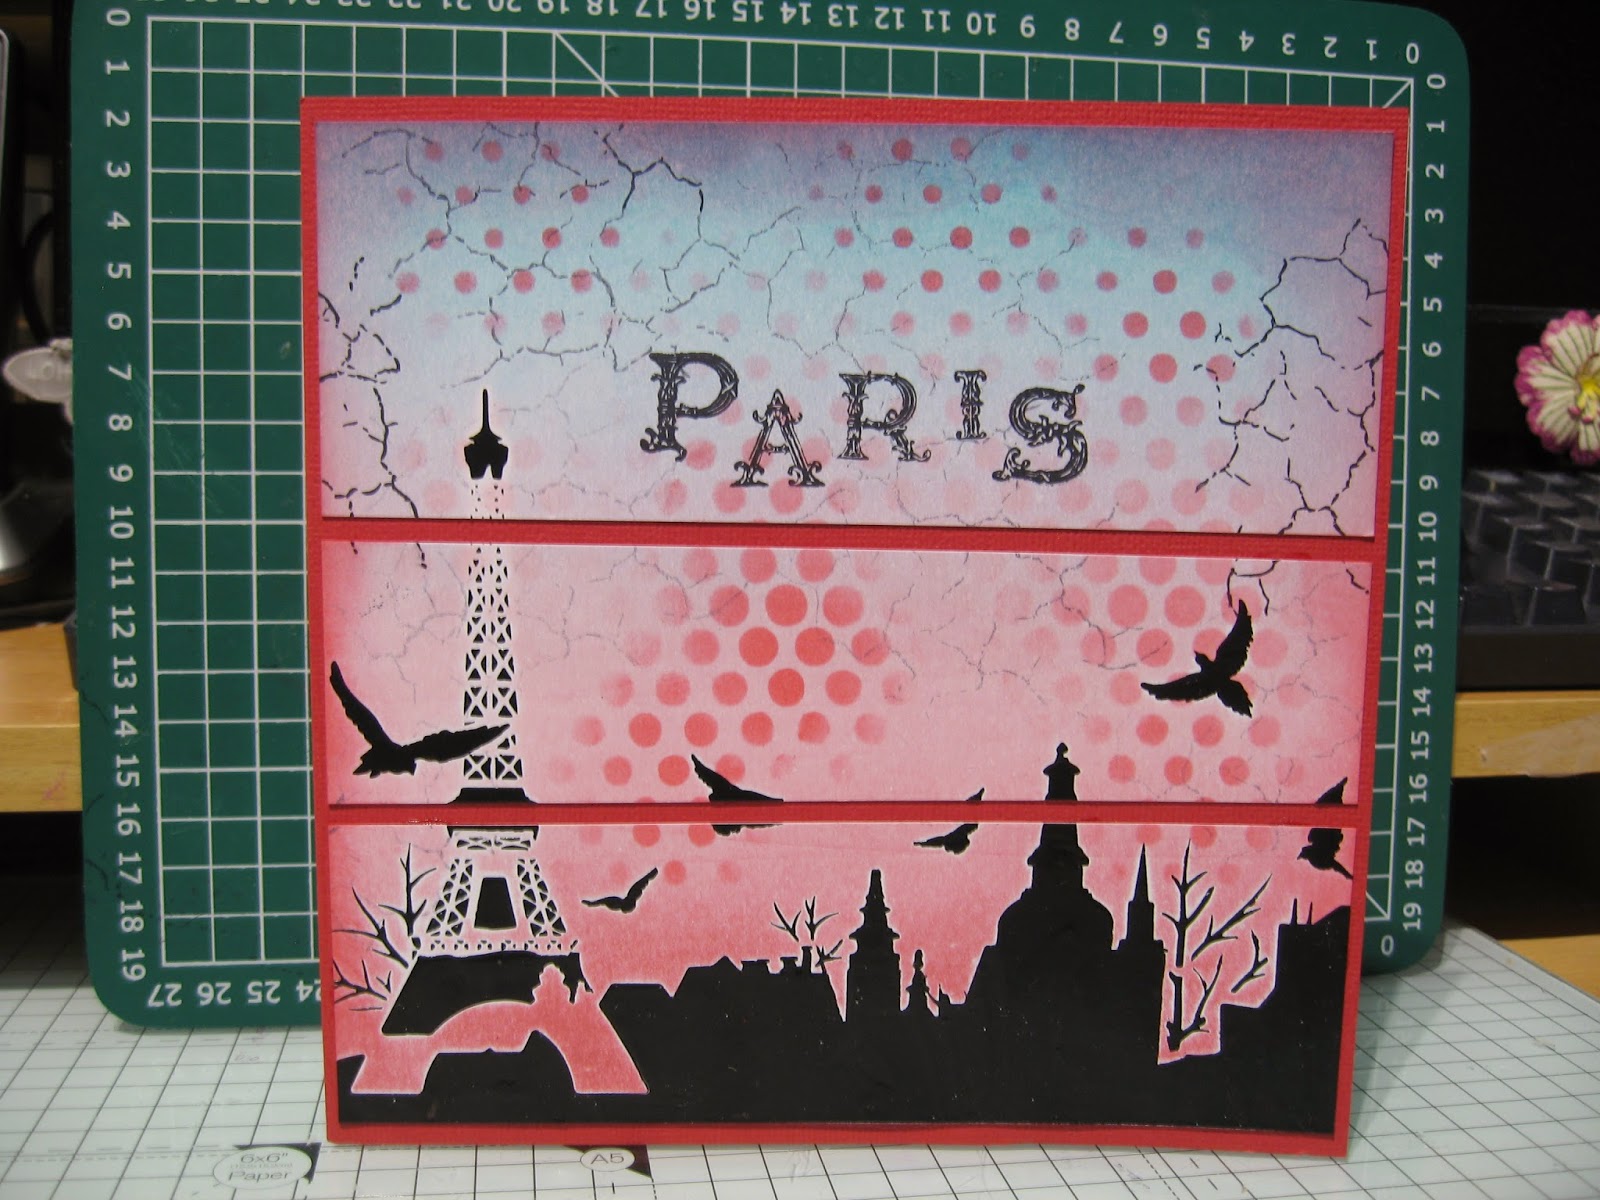
Here are some cards I have made using Sheena's stencils, some glossy black stencil dimensional paste (supplier Sweet Poppy), watercolour paint and Adirondack ink.


I was pleased with my first attempt at making my first piece of artwork using stencils.


I used sparkling medium through this stencil and several different colours of Distress Inks blended to create an atmospheric background.


And finally, a postcard from Paris!

Crafty hugs

Sunday, 28 June 2015

Sparkling Medium

Glitter is used to create a number of effects in the craft world. This decorative material consists of finely cut sparkles that shimmer when the light strikes them.  It can be used to create a realistic look such as sparkling snow or add finishing touches to your cards.  

I have noticed as a crafter how glitter has become highly popular over the last few years and it isn't surprising with so many options to choose from.   Glitter can be bought loose, in various degrees of thickness, from ultra fine to chunky and even hairy glitter; In tubs which is spread on using a spatula and in small bottles which you squeeze out through a fine nozzle applicator.

My favourite loose glitter supplier is from "Stamps by Chloe".  Chloe really is the queen of glitter, embossing powders and stamps.  

I wouldn't be without my Stickles glitter either.  This is produced by Ranger and comes in a multitude of colours.  It has a fine tip applicator and all you do is just gently squeeze to use.  It comes out in a wet gel like substance which then needs to dry.  
  
Over the last week or so I have been working on a number of cards using stencils and sparkling medium which is another form of glitter suspended in a gel.  It is easier to work with than loose glitter. However, it does require you to immediately immerse your stencils in a bowl of water when you have finished with them.  It is a favourite technique because the results are fabulous. 

Sparkling Medium is available from Imagination Crafts.  It also comes in a wide choice of colours and a little goes a long way.

How to use Sparkle Medium:
You attach your stencil to your card stock using some tacky tape.  Then take a small spatula spread a small amount of the sparkle medium over the the stencil.  Spread in two directions and put any excess back in the jar. Peel the stencil away from the cardstock and leave the card to dry for about 1/2 hour. 

Now see how easy it is for crafters to achieve the shimmering and sparkling effect they are looking for below with my finished cards.


and finally a card that was really good fun to make.  If you would like more information on how I made it please read my post called "Domed Cards".


Monday, 25 May 2015

Love and Kisses

Occasionally a craft kit comes along where you can see lots of potential.  A kit by Kanban called "Love and Kisses" gave me that feeling due to the enormity of it and the opportunity to make 6 pop-up boxes, which I have yet to try.

This 100 piece collection features pastel summer time colours with floral designs, wood drift sentiments and pop up boxes.

My favourite elements have been the hand painted watercolour florals and this is where I started.  

Here are the cards I have made over the weekend.  The first being a stepper card.


The second, an A5 card using my Spellbinders Die "Majestic Elements" and cut out the roses.


The third, I cut an aperture and put acetate behind.  Again, I cut out the flowers for the front of the card.


The fifth, I used a die by Tattered Lace.


The sixth is my favourite so far.  I used my new Tonic Trailing Blossom set die to frame the sentiment.


The card set came with some pre cut aperture cards so I embossed this 8x8" mirri card blank with an embossing folder with roses on which I found to match the inner liner of the card. 


The final card I made I also embossed the front, added an acetate window and fitted the card insert.  I may add some flowers to this once I have a bit more inspiration.


Saturday, 9 May 2015

Handmade Slippers

I have finally finished making some slippers. They were a bit of trial and error and have taken a while to complete.  I really wanted to make them in some needle cord but the material frayed terribly and I abandoned it and started again.

The slippers were made from a pair of old recycled jeans and some scraps of fabric that I really adore.  The pattern came from Debbie Shore's Spring Projects Hearts and Flowers Twin CD Set.  

Here is the final result and my husband is very pleased with them.


Saturday, 2 May 2015

Decorative White Tree Ideas


Decorative White Twig Tree 76 cm


I have this tree which came from Hobbycraft.  It was purchased with the intention of providing all year round interest by hanging different things on there according to the seasons.  At Easter I adorned it with hand decorated Easter Eggs and a crochet Easter chick and chicken and since then I have been busy making little bird houses to hang from the branches.

Here are the houses: 


I used a template of the bird house that came from the Hobby House Bird House Wreath Kit.  


When Christmas comes around again I have the option of hanging my handmade felt reindeers, gingerbread man etc or making some more houses but this time in red and white to create a nordic theme.   
 

Ten top tips for the Hobbycraft White Tree

  1. Hang themed and yummy treats from the branches at kids parties.
  2. Use it as a reward for the little ones to hang stars from when they're good!
  3. Craft the perfect centre piece to your wedding or baby shower and ask guests to hang wishes from the branches.
  4. Add festive treats for Halloween or Christmas.
  5. Make a unique advent calendar at Christmas.
  6. Peg family photographs - and make an actual family tree!
  7. Hang your dazzling jewellery collection from it.
  8. Deco mache words and hang their warmly-themed sentiments from the branches.
  9. Get messy with the kids! Make handprints and cut them out to use as leaves.
  10. Craft origami or quilled flowers from paper to prettily nestle among the branches.
  11. Wrap coloured wool around it to reflect the change in season or room theme.
Discover more great ideas  for your  White Tree on Pinterest

However you choose to decorate your tree, have fun!

Wednesday, 22 April 2015

Bags Galore!

Bags Galore is the name of a Project Twin CD rom set by Debbie Shore which I purchased with the intention of getting more out of my sewing machine.  The CD Rom comes with instructions, patterns and most importantly 10 step-by-step video tutorials.  

I have been holding onto some lovely fabrics and zips for some while now waiting for such an opportunity as this so I didn't hesitate to purchase this CD Rom when it was on special offer.

My bag was constructed slightly differently to the instructions in that I made use of the frilly zip which has become a feature by installing it on top of the opening seams.  I wasn't sure how it would pan out and and how I would deal with the ends. However, I managed to tuck and hide these as I machined the final seams before turning the bag inside out.  I have more fabric so will try this again soon and then post my photos below to share with you.

Let us know what you think of my efforts.

Anyone interested in purchasing frilly zips try this website. Although I didn't get mine from here, they have quite a selection of nice colours and I spoke to a very helpful lady.  The size I used was a  9" (25cm) and this fitted extremely well.  If you buy larger, apparently you can trim the ends.

Crafty hugs from Crafty Tashx


Now that I have made a couple more, I am posting pictures of these as well.


Thursday, 9 April 2015

Easter Amigurumi


I am back crocheting again and this is my latest project, sweet little Easter chicks.  I had planned to make baby chicks in a multitude of colours prior to Easter but ran out of time so this is as far as I got.

The patterns came from this book which is available to buy from Amazon's website at £3.25.
  

I like the look of these Christmas ones too!

Enjoy!

Crafty Tash