Mariposa is a great name to describe butterflies in French. Butterflies are enjoyed for their beauty and elegance and it is no wonder that us crafters enjoying using them in our card making.
I have made a few cards over the last week which I would like to share with you using my butterfly dies.
The first card is from my Mariposa die collection which is only available through the Create and Craft shopping channel.
I put the card through my embossing machine to create the embossed background. The embossing folder is one from Tattered Lace and is covered in small butterflies. Tattered Lace are my preferred brand for embossing folders as they seem to get the scale just right for my card making. I have then rubbed Adirondack Ink over the surface in two shades of ink to create some interest to the background. The Mariposa dies were cut to create the background and the foreground. I used some clear acetate behind the wings and glittered them. I was very really pleased with the result.

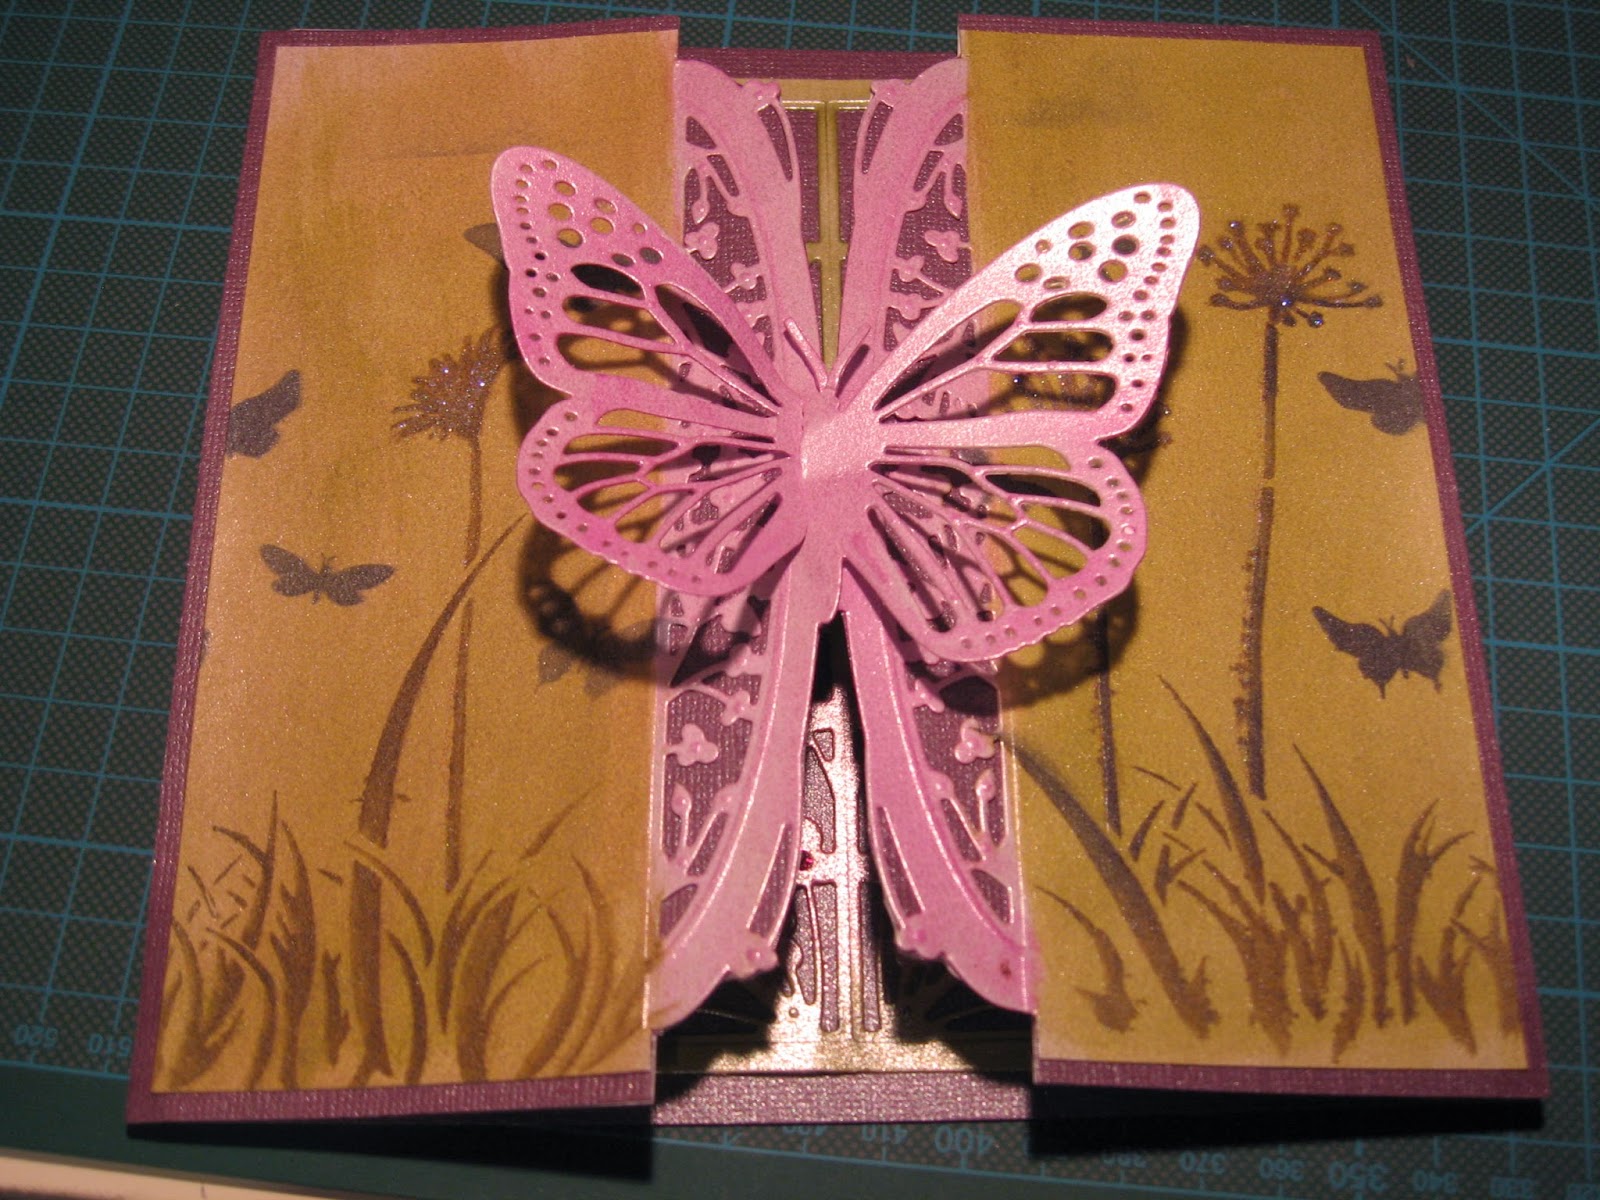
On this next card I have used the same dies but created something quite different. This card has a concertina fold at the bottom and the sentiment is at the back of the card. I used a deep mauve corrugated card for the background to enable the front of the card to stand out. This time I didn't fill in the the area behind the wings and left it so that you can see the pattern I created behind the wings. I coloured the cardstock with my Distress Ink and decorated it with Stickles glitter.

This next card was made again using the Couture Mariposa Die Collection using the closure die. These dies when cut interlock together to form a closure like no other. I used a stencil for the background and decorated the inside of the card using another die.

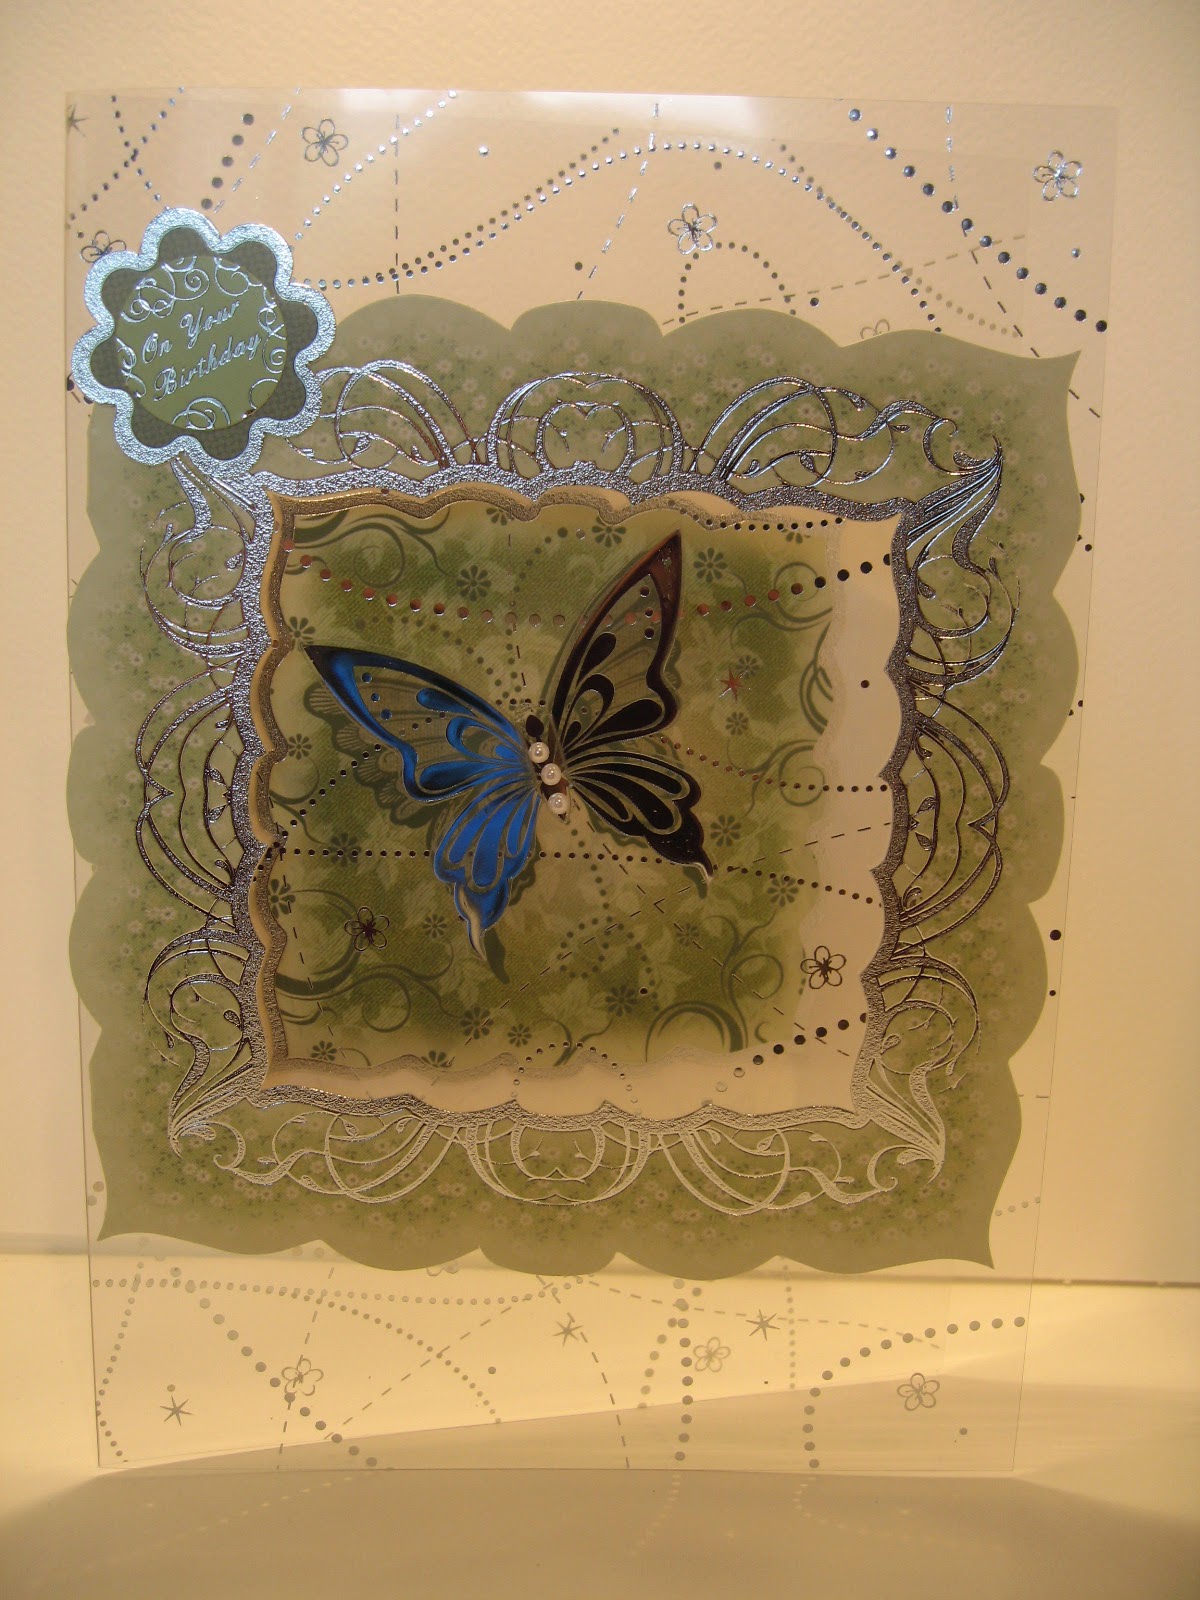
On this next card I used my Die'sire Die which I ran through my embossing machine using Foundations Milk Card. It is high quality card stock available from Joanna Sheen's website. It is lovely the way the wings lift from the card. The background is in Sky Blue, again Foundations Card stock (220gsm). I am not sure it needs anything more added. There is scope to make this in a variety of different backgrounds.

The idea for this card came together very quickly once I had decided to work with my die from Tonic's Indulgence range "Sending a Big Hug". These are really useful dies as there are two halves to them giving you the opportunity to use them in different ways. As you can see from this card I have used the one half to cut out the swirling pattern on the right-hand side but left the left-side filled in.
The paper used came from my paper pad from Melissa Frances called c'est la vie. It has lovely soft vintage tonal patterns.
I have a beautiful butterfly metal stencil from Sweet Poppy Stencils which I used to create the focal point on this card. I used Sparkling medium over the acetate. The pins were handmade using stick pins and beads now available through Creative Expressions.
The flower was created using a Chloe flower stamp which I used with white embossing powder.

Here are some older cards I have made using a kit from Hunkydory and acetate.


Followed by a few made with mixed media. I have used glitter onto acetate for the butterflies and inks to create backgrounds on acetate.

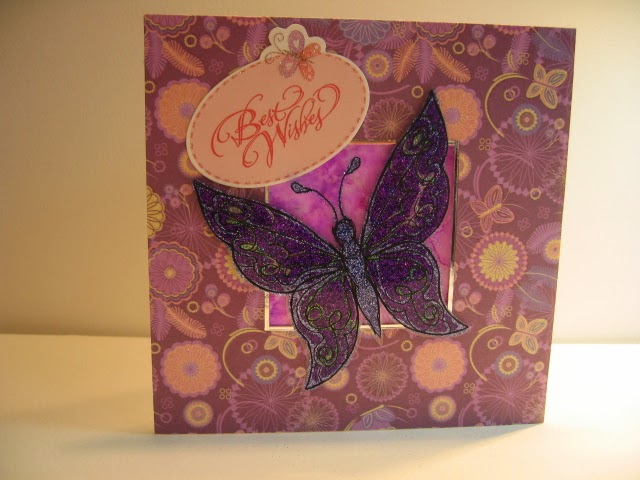


This butterfly was made using Angelina fibres. This technique is great and one that Barbara Grey showed us.

This is a lovely large butterfly stamp I have from Sheena Douglass.

and finally, an Imagination Craft stencil and lots of Sparkling medium were used to create this card The sparkling medium was used onto acetate and mirri card sits behind it.

This concludes my range of butterfly cards I have made over the years, I hope you enjoyed viewing them.
Crafty hugs from Crafty Tash
I have made a few cards over the last week which I would like to share with you using my butterfly dies.
The first card is from my Mariposa die collection which is only available through the Create and Craft shopping channel.
I put the card through my embossing machine to create the embossed background. The embossing folder is one from Tattered Lace and is covered in small butterflies. Tattered Lace are my preferred brand for embossing folders as they seem to get the scale just right for my card making. I have then rubbed Adirondack Ink over the surface in two shades of ink to create some interest to the background. The Mariposa dies were cut to create the background and the foreground. I used some clear acetate behind the wings and glittered them. I was very really pleased with the result.
On this next card I have used the same dies but created something quite different. This card has a concertina fold at the bottom and the sentiment is at the back of the card. I used a deep mauve corrugated card for the background to enable the front of the card to stand out. This time I didn't fill in the the area behind the wings and left it so that you can see the pattern I created behind the wings. I coloured the cardstock with my Distress Ink and decorated it with Stickles glitter.
This next card was made again using the Couture Mariposa Die Collection using the closure die. These dies when cut interlock together to form a closure like no other. I used a stencil for the background and decorated the inside of the card using another die.
On this next card I used my Die'sire Die which I ran through my embossing machine using Foundations Milk Card. It is high quality card stock available from Joanna Sheen's website. It is lovely the way the wings lift from the card. The background is in Sky Blue, again Foundations Card stock (220gsm). I am not sure it needs anything more added. There is scope to make this in a variety of different backgrounds.
The paper used came from my paper pad from Melissa Frances called c'est la vie. It has lovely soft vintage tonal patterns.
I have a beautiful butterfly metal stencil from Sweet Poppy Stencils which I used to create the focal point on this card. I used Sparkling medium over the acetate. The pins were handmade using stick pins and beads now available through Creative Expressions.
The flower was created using a Chloe flower stamp which I used with white embossing powder.
Here are some older cards I have made using a kit from Hunkydory and acetate.
Followed by a few made with mixed media. I have used glitter onto acetate for the butterflies and inks to create backgrounds on acetate.
This is a lovely large butterfly stamp I have from Sheena Douglass.
and finally, an Imagination Craft stencil and lots of Sparkling medium were used to create this card The sparkling medium was used onto acetate and mirri card sits behind it.
This concludes my range of butterfly cards I have made over the years, I hope you enjoyed viewing them.
Crafty hugs from Crafty Tash
Hello your cards are beautiful! I have a question for you , I have the Mariposa Collection and I can't seem to find instructions on the use of the closure dies and I see that you use them on one of the cards you made. My question is do you have a you tube channel that gives step by stem instructions on how to use these dies, I am a visual learner and need to actually see how things work. Thank you and again your work is beautiful.
ReplyDeleteHi there, thank you for commenting on my cards, it is much appreciated. I too found using the closure dies a little tricky then I recently saw a demo and this is what they did. I haven't tried it but it does seem a sensible way to do this.
DeleteTake two pieces of card stock that you want your closure made from. Ensure they are as big as the card you wish to make. It will be cut to size once you have cut the closures out. Place the die along the edge that will be a closure. Cut the closure die out with your die cutting machine. Take another piece of card and this time ensure that you use the opposite closure die. You should now have two pieces cut out, a right and a left of the butterfly which are ready to trim down to size.
You can then use these pieces to mat and layer over the gatefold opening of your card. Doing it this way ensures that the closures are the right size.
Good luck and do share with me on your Google+ as I would love to hear how you got on as I need to try this method too. Best wishes, Crafty Tash