Friday, 8 July 2016

Birthday Shadow Box Die Card

I am enjoying a few days at home this week which is giving me an opportunity to watch all the live "Christmas" shows on Hochanda.  Needless to say I am getting inspired by ideas and taking advantage of great savings.

I would like to share with you a card I have finished making using Sue Wilson Birthday Shadow Box collection.  

Whilst watching Sue Wilson demonstrate on the Hochanda show I saw her demonstrate a product called Pixie Powder.  This is a similar product to the Brusho and used in the same way.  What I liked about these particular powders is that they have a mica powder in them and I like the finish.  Also, the containers they come in have a fine nozzle so it it easy to tap out a small amount.  With the Brushos you need to pierce the lid to create a small aperture and that isn't obvious!  The Pixie powders are also clearly identifiable because they have colour labels.  This makes it easy to tell which one you have picked up which I struggle with when using the Brushos.  Both products have a place in my craftroom but I suspect the Pixie powders will be a firm favourite.  

The collection of Pixie powders I have are Midnight Blue, Peacock Green, Aqua Lagoon and Teal Wash.  I used the Midnight Blue, Aqua Lagoon and a touch of the Teal Wash onto some card and used this as the background for the Shadow Box die.  There was just enough card left over to cut out some of the small balloons and coffee cups.  The Tea pot and cups are a product of Joy! Crafts.

Once I had cut out the Shadow Box die and mounted it onto the background I had made with the Pixie Powder, I cut out the smaller dies to put in the apertures.

I was unsure how I was going to mount it because of its size.  I decided to make a stepper card to mount it on.    I own a stepper card die which wasn't wide enough but it gave me a basis for creating one myself using Cameo Silhouette.

Now for the enveiling - da da!


Saturday, 2 July 2016

Mr & Mrs Wedding Card

I love the fact that I can combine my Cameo Silhouette with my dies.  I have a lovely new large die from Crafter's Companion decorative Create a Card dies. It is perfect for creating a lovely edge on the front of cards.

Here I have combined it with a finely detailed topper (Mr & Mrs) that I purchased from the Silhouette Design Store.  The beauty is that I was able to re-size it to fit the area in the middle of the card. I also used a Tattered Lace die for the bride and groom.  The card has an easel stand at the back to hold it upright and a personal sentiment.


Saturday, 25 June 2016

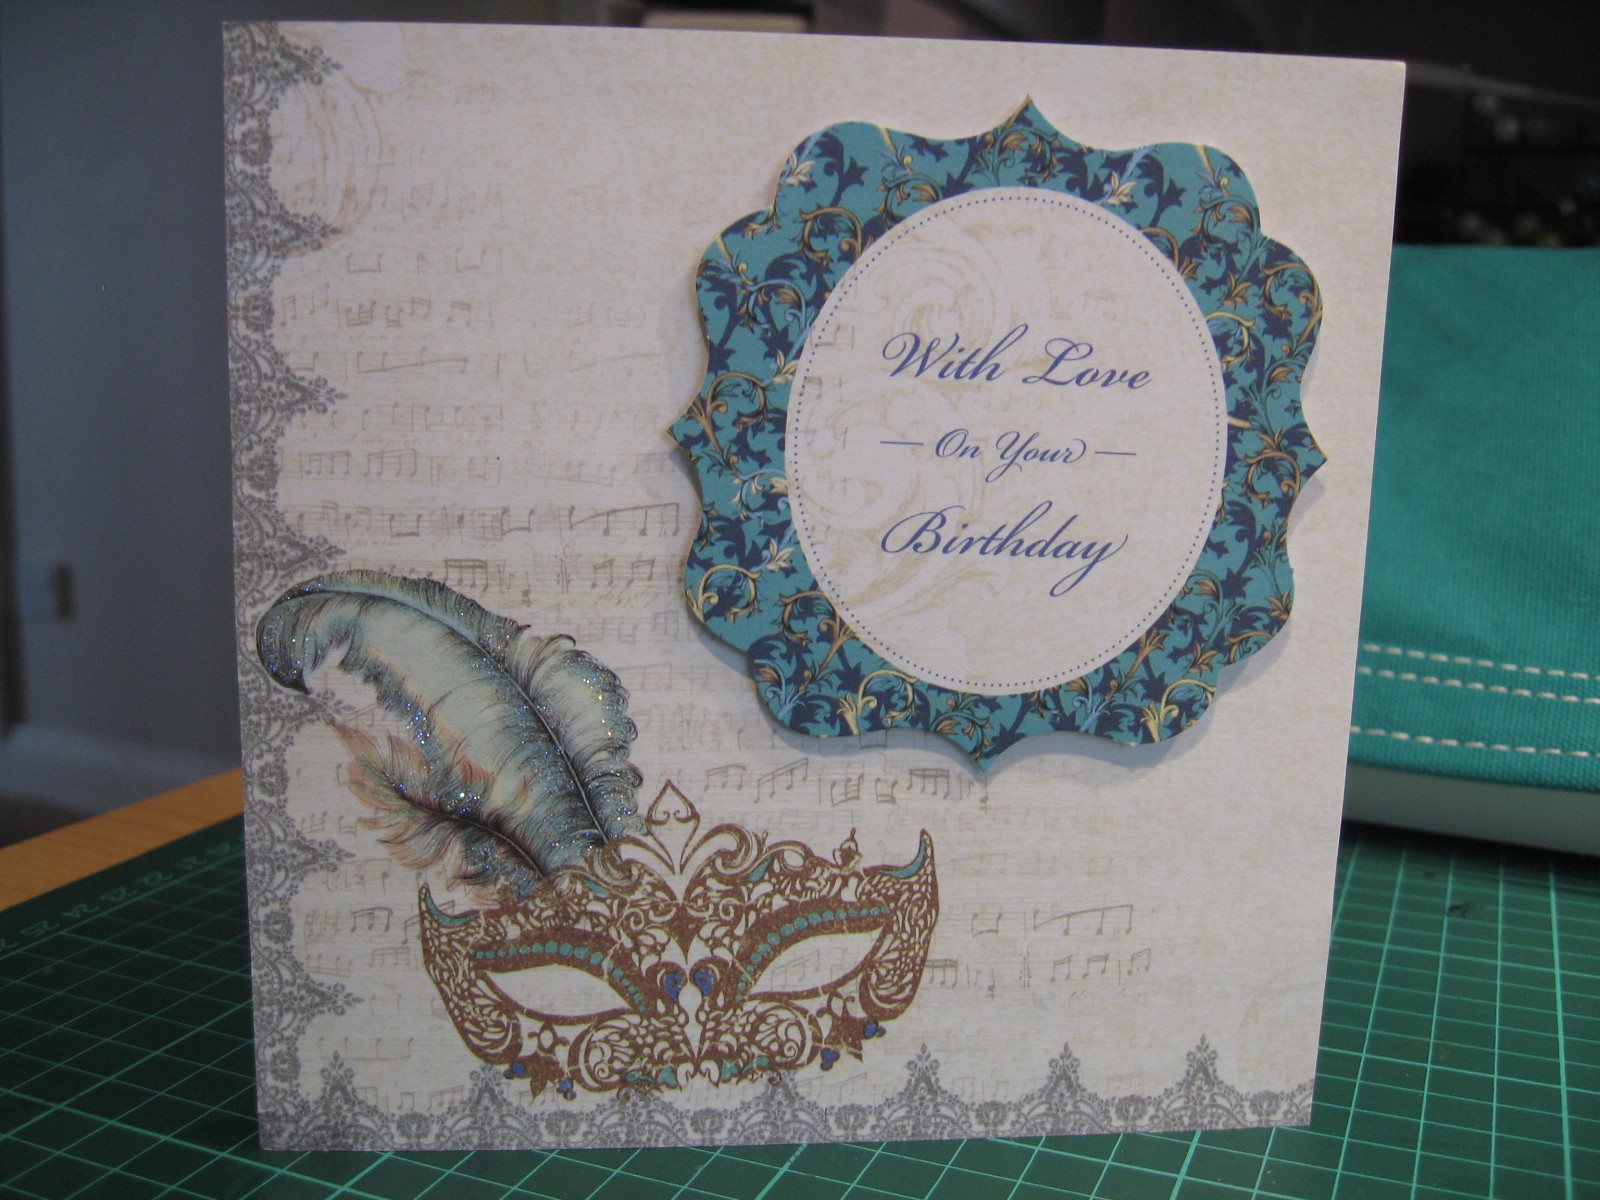
My Craftwork Cards - Venetian Card Collection

I have made a point of trying to finish this card collection that I started many moons ago.  I love the tones of blue and turquoise in this collection and I happened to have a venetian mask die that came in handy.  The toppers ran out before the paper pad did so I have tried my hand at some paper folding techniques.  I still have lots of paper left but it is time to move onto something else so I am uploading my cards to share with you today.


Saturday, 18 June 2016

Stamping around!

I have been playing around with some stamp sets by Leoni Pujol.  I have used some fusible fibres on some of these.  Leoni released these new stamps on the Hochanda Show recently.  It has become my favourite TV craft show for inspiration.  

The first card I made was very simple to do. In fact it took me longer to delve into the back of my cupboard to find my fusible fibres and craft iron!  I simply ironed the fusible fibres between a heat resistant craft mat to fuse the fibres together.  I then used Leoni's heart stamp as a guide to cut around as I liked its quirky shape.  


On this next card I joined several of these hearts together to form petals of a  a flower.


I used a technique new to me on this card's background below.  I applied ink to the stamp and then misted it before stamping.  I then re-stamped the card over the top of it once it was dry.  I then stamped and coloured some butterflies and stuck these one.


This time I use white embossing powder and stamped the card before applying my aqua paints.  I really love this effect.


On this last card it was this stamp set that I fell in love with.  I just loved the image of the young girl and the idea of making the wings look real with fusible fibre as demonstrated by Leoni on the Hochanda Show.  I had been playing with my aqua tint inks and had some cardstock left over which had fleshy colours so I was able to use this card to make the flesh look life like.


Saturday, 11 June 2016

Wedding Bells Lantern

I am trying to make a point of making Monday's my "Silhouette Monday Day" so I will keep developing my skills and knowledge of this machine and software.  

All was going well, I have had my machine since March and getting on well with it.  That was until it started crashing when I needed to use the text tool.  It became so bad that I couldn't use it without it crashing on me.  Fortunately the American owned company were very helpful and sent me some helpful instructions.  After a download of the latest version and some deletions of files, fingers crossed, it seems to be working fine now.  

So to my next project that has come about because I have a wedding invitation to an evening reception this evening and wanted to make my own card and gift.  The gift I have made is miniature bunting that is wrapped around a large cotton reel. Here it is wrapped around the cotton reel.  I preferred the cotton reel painted with some vintage chalk paint so I have now painted it (see below).


As you can see the bunting spells out "Mr & Mrs".


I then made a box to put the gift in using my Cameo Silhouette and a flourish card with the words Mr & Mrs across the front.  Both designs were purchased from the Design Store for 0.99$.  

It was nice to be able to finish off the inside of the card using the text tool, without it crashing on me!  The Wedding Bells Lantern was slightly enlarged before cutting on the Silhouette so that the cotton reel would fit inside it.  The panels were cut from vellum.


Saturday, 4 June 2016

A Tangle a Day!

Tangling is very therapeutic and completely self absorbing.  Once you breakdown the construction into zones it becomes much easier than it looks.  

I just love the way it is used in art.  Many different tangle designs are used to create images that look wonderful like these examples.


So I am on a mission to try and learn some tangles so that I can produce lovely works of art like those I have shown you.


I have a set of tangle cards and this is the first one I wanted to try.  I have found an illustration of it on internet so it goes to show you don't need to invest in books as there is plenty of ideas out there. 


It looked lovely in black and white but I decided to colour it in using my Spectrum Aqua Markers.


It is suggested that you start with a 4" square and put little pencil marks in each corner and then join up the dots to make an area to tangle in.  The area then needs dividing into smaller areas, here I have made a triangle and started a tangle within different sections.  By the time I got to the middle section of the triangle I was feeling quite bold and put two different tangles in this space.  


This final tangle looked very difficult at first to create again, I started off marking out a frame around the edge of the card.  I then draw a line down the centre, rotated and down the centre again.  I then draw a line on the diagonal from corner to corner and rotated the card and did this again.  Now I had the sections marked up I was able to start working within them.  


I draw from the bottom, almost to the top, slightly curving my line as I approached the diagonally drawn line and finished by marking a circle.  I then came in from the other side of this area I was working in and drew another line so the line alternate, first to right, then to the left etc.  It is really effective. Hopefully, the illustration above that I have found will show you what I mean.


Finally, here are some tangle cards I have made to use as a resource.


Saturday, 28 May 2016

Simply Gorjuss

Today I am sharing with you a card I have made that has taken me virtually all day!  That is because today was aimed at being a "play and see" where it takes me day.


I started the day playing with my Spectrum Noir Watercolours making backgrounds on watercolour card and then sometime experimenting with different promarkers to colour in my Gorjuss stamp. 

I then decided to take one of my accordian card dies (Create a Card) Diesire from Crafter's Companion and cut out the watercoloured card stock to make a frame using the snowflake overlay which looked lovely in the blue.  I also cut another piece of card that I had washed with my watercolours using a scallop edge die from the set.  

A quick look through my paper stash and I found that the background paper from my Serenity cardstock (Craftwork Cards) would pull this altogether especially if I made use of the tiny flowers that come with the Serenity paper craft pad. Fortunately for me that I had already pressed these out and shaped them into flowers some time ago whilst sat in front of the television!

Saturday, 21 May 2016

Decorated MDF Box


I have been getting really crafty with my latest project and moving into the realms of mixed media!  I had a box that needed decorating and I wanted to use some embossing paste on it. I searched through my stencils and found one that I liked both the scale and design of.  I then used some of my tacky stencil glue to hold it in place on the box whilst I spread the embossing paste (Dreamweaver product) over it.  The paste dries within one hour which means not too long to wait before I could start on the next side!


After I had covered all the sides and the lid I then used some grey paint, suitable for using on mdf, to cover the inside and outside of the box.  This product came from Imagination Crafts and it comes in a 60ml bottle.  It is lovely and thick and I highly recommend it because the coverage was excellent and gave a lovely finish. 


The final coat of paint is another product from Imagination Crafts called Starlights.  Starlights are a metallic paint that come in a variety of colours.  They have a super metallic finish.  I used the very beautiful teal and silver paints, dabbing it on and blending together to create different hues of blue.

Here is the end result.  I now have a decorated box and I am using it to put my Tattered Lace corner embossing folders in.


Saturday, 14 May 2016

Butterfly & Dragonfly Cushion Covers

A new week has passed us by and I am writing about a new craft experience for me.  I purchased some lovely linen looking cushion covers from Hochanda recently with the intention of printing onto them using some stamps from Indiglo Blu and some of their fabric paints.  I also tried using my Luminarte Silk paint (all purpose paints) which work on a varety of surfaces including fabric.

I used Indiglo Blue's Raven Black Metallic Paint to stamp the lovely dragonfly, one of my own small butterfly stamps in the Indiglo Blue Kingfisher Blue Paint and the larger butterfly I stamped using the Luminarte Silks paint.

Before working with the paint I put a piece of 12x12 cardstock inside the freshly ironed cushion cover to protect any paint leaking through.  

I used some sponges to apply the paint to the stamp but it worked equally well and if I may say perhaps better, when applying the stamp to my craft mat area where I had some paint.  With this method your fingers kept clean and this is important in case you accidently get paint onto the fabric.

Anyone trying this for the first time, have a go on some scrap fabric so that you can get used to knowing how much paint you need on your stamp.

Here is the end result.  Some cushion covers for our home which I am very proud of and had fun making.


Saturday, 7 May 2016

Leonie's Wee Stamps

I couldn't resist getting my hands on these little stamps by Leoni Pujol.   They are really useful for pattern building.

I created my own stencil of the word "Father's Day" using my Cameo Silhouette and then used some Stencil Glue by Pinflair.  This is a really good product.  You use a sponge to apply it, wait five minutes then you have a tacky background.    I then stuck down the words and sponged colour over this. Following this I stamped these little dies over the words and finally, coloured them in with sparkle pens and gel pens.  Only when I had completely finished working on the card did I peel away the words to reveal the area underneath.

Here is the end result.  I hope you enjoy them.