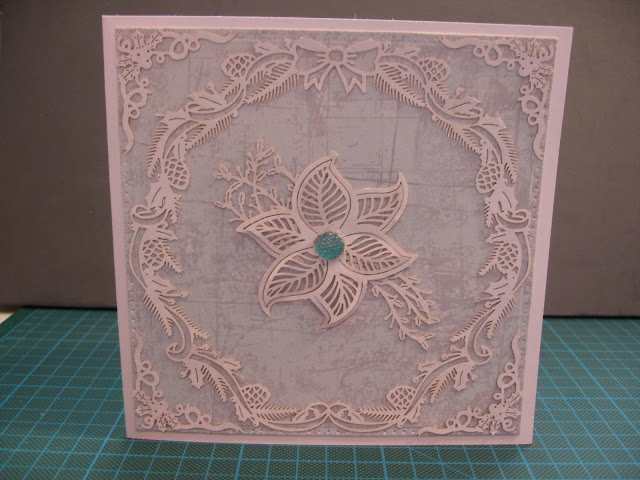
I had so much fun working with these Stylish Silhouettes from Hunkydory and as you can see have made so many cards and they are all very different.

I created the background with inks and then stamped on the trees to make a bright winter card.
This is a a background created on acetate using coloured tissue powder and Pixie Powders with mica in them.
I created a wash of colour on the background before decorating the individual baubles.

This card was made using the paperpad that I purchased with the matching stamps for this collection. I have used dies to cut out the baubles and then lay cardstock behind. The proportions are just right.
This was another one made using the paperpad and a lovely wreath die by Chloe.
This card was put in an embossing folder then I used a piece of acetate that I had leftover which has the tissue paper technique for the background with pixie powders.
Here is my first snow globe card. I have used the matching stamps to create this.
Another card using the paper pad. This time I cut an aperture out and hung baubles on the front of the acetate window. The paper behind is from Phil Martin's paperpad.
I love the simplicity of this card.
Again, this one is simplicistic and well balanced.
The wreath's in the paperpack are ideal for creating little scenes in.
This isn't an original but I loved it so much I had to recreate it with my own spin!
Again, I think I copied this idea but put my own spin on it.
So beautiful!
This was fun to make. I used one my dies from Crafter's Companion along the edge of the frame. Doesn't it work well! Again the background is acetate that was decorated with Pixie Powders and tissue paper. It is one of my favourite cards.
And here is another favourite. I inked the cardstock around the edges and used matching gems to decorate the wreath with.
I thought it was a great idea to use the frames that the Stylish Sihouettes were attached to. Again I did a colour wash over the background. It has made a lovely dramatic background. I did the same on the card below.
I have used an acetate to cover the front of card here. Another idea I liked and wanted to try.
Again, I have been creating a background with inks and all the little houses are coloured black.
This was a sample in the book that came with the Stylish Silhouettes. I love the use of pink and green together.
Another colour wash was used for the background on the next two cards.
I was trying to tell the story by dividing the card up in panels.
Well that was the last of the cards. I have a few bits leftover but as you can see the Stylish Silhouettes made a lot of cards. I also still have the paperpad left and the stamps.
This has to be my most favourite Christmas papercrafting kit of the season.
I hope you enjoyed looking at my cards.


Love all these cards .Thankyou for sharing. Can you answer this question though please? These 'stylish silhouettes' are they pieces you can take off the paper then emboss through them? Then they are reusable. Or are they one time use by gluing the pieces on a card and they can't be reused? I'm just getting mixes messages lol.
ReplyDeletehttp://www.hunkydorycrafts.co.uk/papercraft/stylish-silhouettes/a-white-christmas.html I have shared a link to where you can view/purchase the Stylish Silhouettes so that when I try and answer your question, it may make sense. These images are laser cut and have tiny tags securing them in place. They just need snipping to release. You can use them as you wish i.e. as they come or add some colour which I did with the baubles. I think they are fab and enjoyed making cards with them. Some of the cards above were made from a paperpad that was designed to complement the the laser cut pieces. So, no embossing and can only be used once unless you recycle the card.
ReplyDelete