Saturday, 29 August 2015

Paper Quilting card

This was a fun card to do and made a nice background to sit my bunny toppers on.   It is a good way to use up scraps of paper too and it didn't take very long to cut these squares out and then stick onto a plain piece of paper. Once stuck down I then did a zig-zag decoration to look like faux stitching and hey presto, I have made a paper quilt.

I must try this again sometime soon!


Here is the finished card.


I hope you enjoy it and that I have inspired you to have a go at this simple technique.

Crafty hugsxxx

Saturday, 22 August 2015

Exploding Box


With this Gift Box template you get 7 dies which allow you to make an exploding box with a lid; it also comes with elements to decorate it. 

I think these are really cool and now the hard work of measuring and cutting has been eliminated, they are far easier to make. Having said this, this one below was a labour of love as it was experimental, being my first use of the dies.  The bow on the box was made using the Gift Bow template.


and this is what it looks like when you take the lid off!


I used my haberdashery dies to make the little sewing elements including the buttons and the mannekin.  These were cut from balsa wood and then decorated.  

I just love the use of blue and cream together don't you?

Crafty hugsxxx

Thursday, 20 August 2015

Christmas Tree Surprise

 Pinflair produce some fantastic products for craft and home decor projects  This Christmas tree can be used as an advent calendar or be prominently displayed on your table on Christmas Day then opened to reveal a box inside where you can place your own special surprise for your dinner guests. 

I preferred the idea of decorating mine with chalk paints/stencils as recently demonstrated on Create & Craft so I purchased the Cartonnage kit which saved me £10.  I then looked through my crafty stash of papers and found some lovely 12x12 paper from Papermania called Home for Christmas which inspired me to using this instead. 

I must admit to having had this paper stashed away for a few years now just waiting for the right moment to use it as it is simply gorgeous.

This is the end product and it is lovely.  There is a cone shaped top that lifts off so that the sides splay out to reveal a hidden box inside which you can then fill with sweets or chocolates, hence the name "Christmas Tree Surprise".

I didn't want to make a chain of beads to drape around the outside of the tree as suggested so I found some quality ribbon which I adhered to the back area of each of the sides in a zig-zag formation.  The ends were neatly hidden by the inside panels.    I plan to buy some mini pegs and may cut out some stamp sized numbers 1-24 so that it looks like an advent calendar.  

The tree has a separate base which it rests on.  At the moment I haven't glued this onto the tree as I plan to make it hinge so that I can hide some last minute treats in it just for me!

c


This next image illustrates how the item looks once the top is removed and you can see how the sides are held in position by the use of some cord.  They are held in place between layers of cardboard both at the tops of the tree and inside the box like so.


A final view of my tree.  Now that I know the cord is doing its job I will glue the inside panels to the edges of the box.  They are currently just pushed into position so I can check that the mechanics work.  


I am very pleased with my Christmas Tree Surprise and hope that my dinner guests will be at Christmas too.

Whilst writing about Pinflair products I would like to share with you other Pinflair products I have made over the last few years.

This sewing box;


and this tissue box:


Friday, 14 August 2015

Brushos

My earliest introduction to arts and crafts was watercolour classes but it is something I never felt particularly good at it. I think you need to be an artist and I am not particularly arty or good at drawing.  I think I am more of a crafts person really which is why I enjoy cardmaking and other hobbies.

Bearing in mind that I like the effect of watercolours, and prefer this medium to many others, I was quite excited to discover something that can be used in a similar way to watercolours and that is Brushos.

Brushos are a brilliantly intense paint powder that come in small plastic pots.  Brushos are made in the UK, Surrey and have been around a while but have slipped under my radar until recently.  They come in small plastic pots.  You can either mix the powder with water and use like watercolour paint with a paint brush or apply to your card stock either before or after spritzing it with a fine mist of water.

If you intend to work loosely with this product it is recommended that you pierce a small hole into the lid as opposed to opening completely to avoid spillage.  A small hole is adequate as you only need the tiniest amount to work with.    

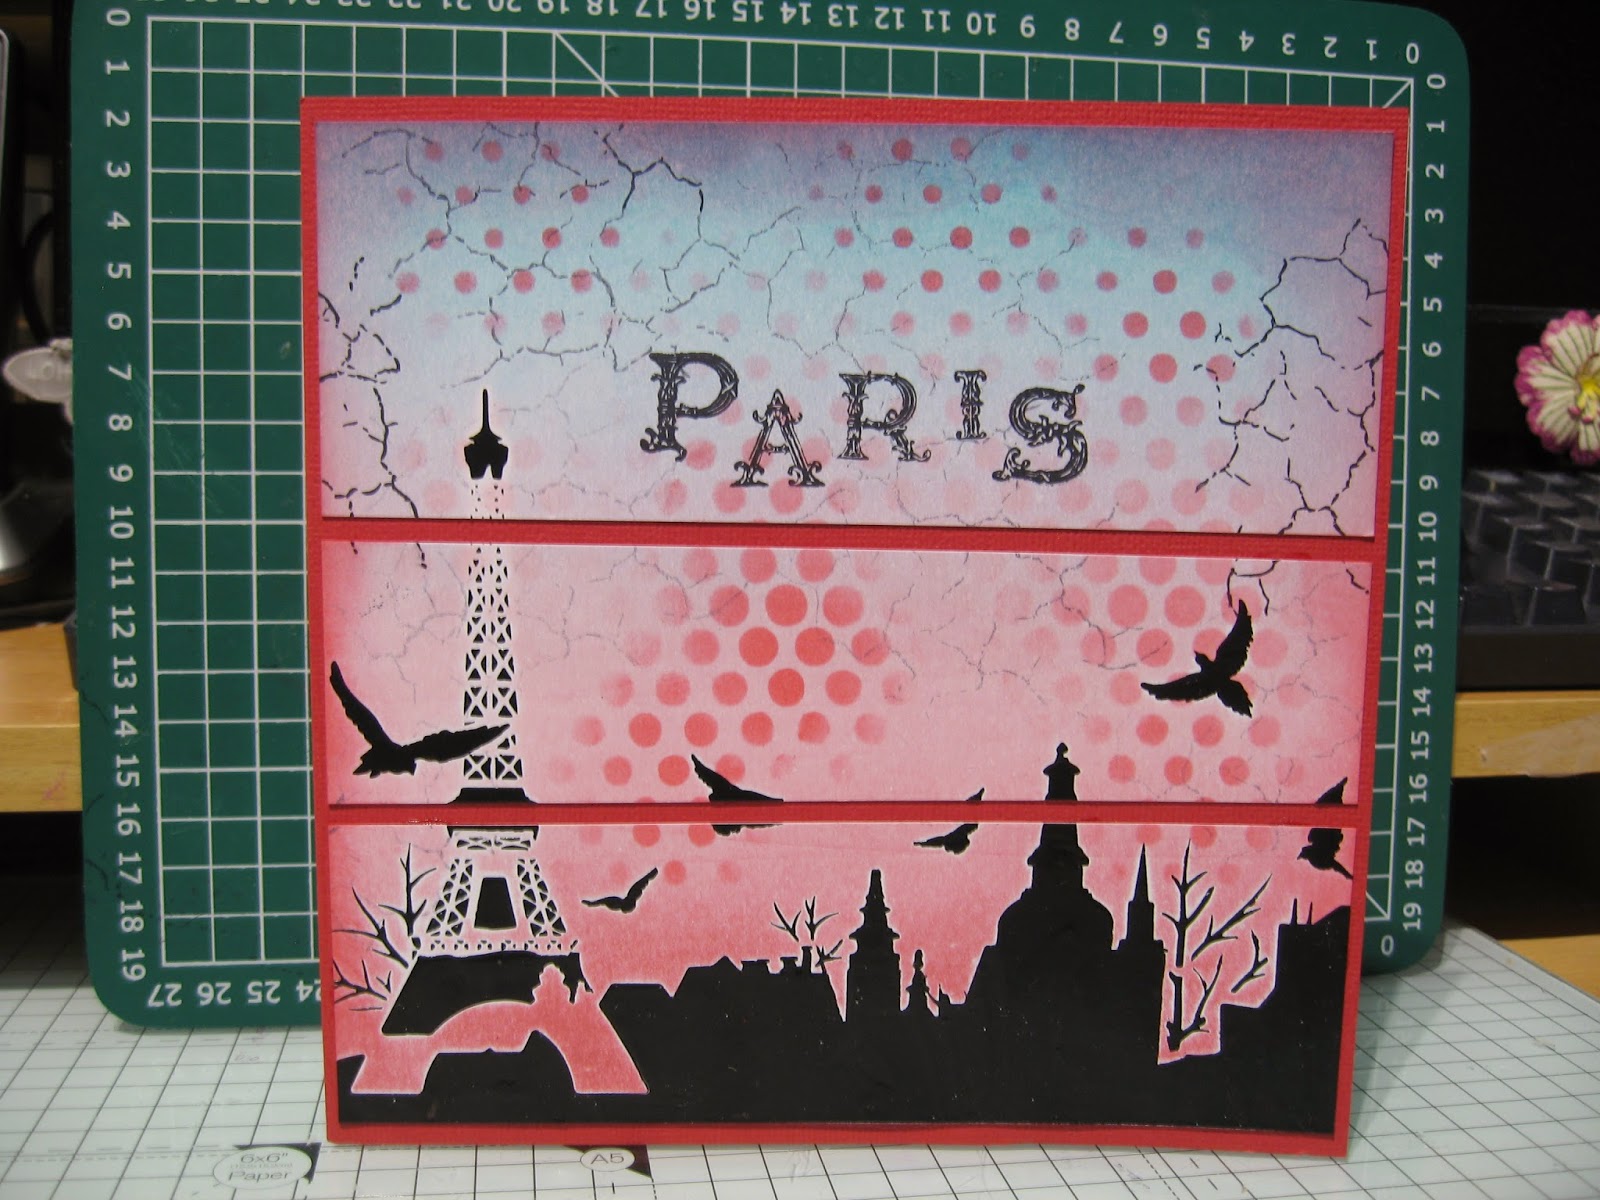
There are different ways of using your Brushos as I mentioned above and I would like to show you my creations where I have first sprinkled the paint crystals onto the card stock then sprayed with water.   Instead of relying on my own drawing skills, I have used stamps to build the artwork into a picture.

Here are my first few attempts.  Once you start to combine them with stamps they make a really cool background to your images.


Stamp: Inspired by Banksy - Hope


Wildflowers SA-5029 stamps by Stamp Addicts


 Stamp: Inspired by Banksy - Hope


 Wildflowers SA-5029 stamps by Stamp Addicts


Stamp: Inspired by Banksy - Swing


Stamp: by Stampendous

There are videos available on YouTube providing demonstrations.  https://www.youtube.com/watch?v=Y3m1S0Y7bc4

The videos I enjoyed came from Bee Crafty whilst watching the Great British Craft Network (www.britishcraftnetwork.tv)

Bee Crafty have their one webpage and blog which is worth visiting http://www.beecrafty.net/


I hope you enjoyed my artwork. If so, do spare a moment and comment on my blog page.  Thank you, Crafty Tash

Sunday, 9 August 2015

Domed Cards

Here is a clever concept I have been meaning to try but wasn't sure how it worked until recently.  It is a card with a domed front which can fold flat for fitting in an envelope.

A piece of acetate is cut slightly longer than the width of the card and fixed in place down the left side using double sided sticky tape.  To hide this it is then covered with a narrow piece of black card. Then on the right hand side of the card another narrow strip of card is stuck down with only a thin strip of glue which is just enough to leave a flap which the acetate can tuck into. When the acetate is tucked into the flap it creates the domed front.  


I saw this particular card idea on the Create and Craft channel when Sue was on showing products from Imagination Crafts.  They are one of my favourite products as I like using their Sparkle Medium which is glitter in a gel suspension so it is spreadable.

The reason I choose this particular stencil to try my first domed card on was that the effect it created using the domed front and the stencil in reverse.  It actually makes the merry go round look like it really is going round.


First I used the Sparkle Medium on 6x6 black gloss card using the stencil then reversed the stencil and used it again on some acetate.  When dry I constructed my card.


Friday, 31 July 2015

Divine Thoughts

I have created some cards for the celebration of a life which I would like to share with you today.  They are made using Serif Craft Artist Digi Kit called Divine Thoughts and were a commission for a friend's beloved mother who lived to be 103.  It is her funeral today and although I have never met her I think she is quite remarkable.


Sunday, 19 July 2015

Pop Up Card

I heard today that it is just 18 weeks until Christmas!  Not surprising then that crafters are happily making Christmas cards and projects.  

Today I have been making a pop up box card with a nativity scene from Tattered Lace dies.  It has been a real joy to cut out my dies with my new Spellbinders Sapphire machine.  It is perfect for those smaller dies and because of its size and weight, it is very portable.

Here is the end result and I am very pleased with it.  There is a small crib but the angle of the photograph has hidden it from view on the first image so I have taken a second.    Pop up boxes will fold flat for posting and are great fun to make.


Saturday, 11 July 2015

A Tivoli Christmas Advent Calendar

I couldn't resist the offer of purchasing a Tonic Forever Moments Tivoli Storage Unit on Create & Craft last week as they were half price.  These first came out last October and I held back then mostly due to the price and also due to lack of experience in these types of projects.    Although useful as a storage solution for those smaller things that seem to get lost in big drawers, the reason for my purchase was to make this work as an advent calendar, something I had always aspired to owning.  Christmas feels that much more special when you fill your home with lots of homemade items.  However, I can see me making use of this all year round if I turn the drawers around and add little drawer handles.

The actual unit is constructed from mdf which simply slots together.  All you need is a little bit of glue which is provided with the project.  I took the advice of leaving off the back panel until I had applied a couple of coats of paint onto the mdf.  This prevented pools of paint forming at the back and was much easier to paint.  I painted the back piece separately and then fitted it on when the paint was dry.  In normal circumstances I would save the painting to last because of the risk of the mdf swelling and then joints not fitting but this didn't seem to be a problem and I was careful when applying paint need the joints.

The drawers are made up of strong cardboard pieces which are ready to glue together and decorate as you wish.    Again, I painted these first before construction to make it easier.  It is surprising how long it takes to apply two coats of paints twice over on 24 little drawers!  Still, I had the TV on in the background which kept me company.  I then sealed my drawers with some Modge Podge to protect from wear and tear before gluing the corners together. 

Finally I decorated each drawer front with paper I had from my Mind’s Eye and numbered them 1 to 24!

Here is a photo of the finished result.


Saturday, 4 July 2015

Stencilling

This past week or so I have been looking at new ways of making my cards by using stencils, paint and watercolours.

My inspiration has come from well known artist called Sheena Douglass.  Sheena is a favourite amongst us who watch the Create and Craft shopping channel as she demonstrates that with the right tools and equipment, anyone can be an artist even, if like me, you find it difficult to draw!

Here are some cards I have made using Sheena's stencils, some glossy black stencil dimensional paste (supplier Sweet Poppy), watercolour paint and Adirondack ink.


I was pleased with my first attempt at making my first piece of artwork using stencils.


I used sparkling medium through this stencil and several different colours of Distress Inks blended to create an atmospheric background.


And finally, a postcard from Paris!

Crafty hugs

Sunday, 28 June 2015

Sparkling Medium

Glitter is used to create a number of effects in the craft world. This decorative material consists of finely cut sparkles that shimmer when the light strikes them.  It can be used to create a realistic look such as sparkling snow or add finishing touches to your cards.  

I have noticed as a crafter how glitter has become highly popular over the last few years and it isn't surprising with so many options to choose from.   Glitter can be bought loose, in various degrees of thickness, from ultra fine to chunky and even hairy glitter; In tubs which is spread on using a spatula and in small bottles which you squeeze out through a fine nozzle applicator.

My favourite loose glitter supplier is from "Stamps by Chloe".  Chloe really is the queen of glitter, embossing powders and stamps.  

I wouldn't be without my Stickles glitter either.  This is produced by Ranger and comes in a multitude of colours.  It has a fine tip applicator and all you do is just gently squeeze to use.  It comes out in a wet gel like substance which then needs to dry.  
  
Over the last week or so I have been working on a number of cards using stencils and sparkling medium which is another form of glitter suspended in a gel.  It is easier to work with than loose glitter. However, it does require you to immediately immerse your stencils in a bowl of water when you have finished with them.  It is a favourite technique because the results are fabulous. 

Sparkling Medium is available from Imagination Crafts.  It also comes in a wide choice of colours and a little goes a long way.

How to use Sparkle Medium:
You attach your stencil to your card stock using some tacky tape.  Then take a small spatula spread a small amount of the sparkle medium over the the stencil.  Spread in two directions and put any excess back in the jar. Peel the stencil away from the cardstock and leave the card to dry for about 1/2 hour. 

Now see how easy it is for crafters to achieve the shimmering and sparkling effect they are looking for below with my finished cards.


and finally a card that was really good fun to make.  If you would like more information on how I made it please read my post called "Domed Cards".