Monday, 25 May 2015

Love and Kisses

Occasionally a craft kit comes along where you can see lots of potential.  A kit by Kanban called "Love and Kisses" gave me that feeling due to the enormity of it and the opportunity to make 6 pop-up boxes, which I have yet to try.

This 100 piece collection features pastel summer time colours with floral designs, wood drift sentiments and pop up boxes.

My favourite elements have been the hand painted watercolour florals and this is where I started.  

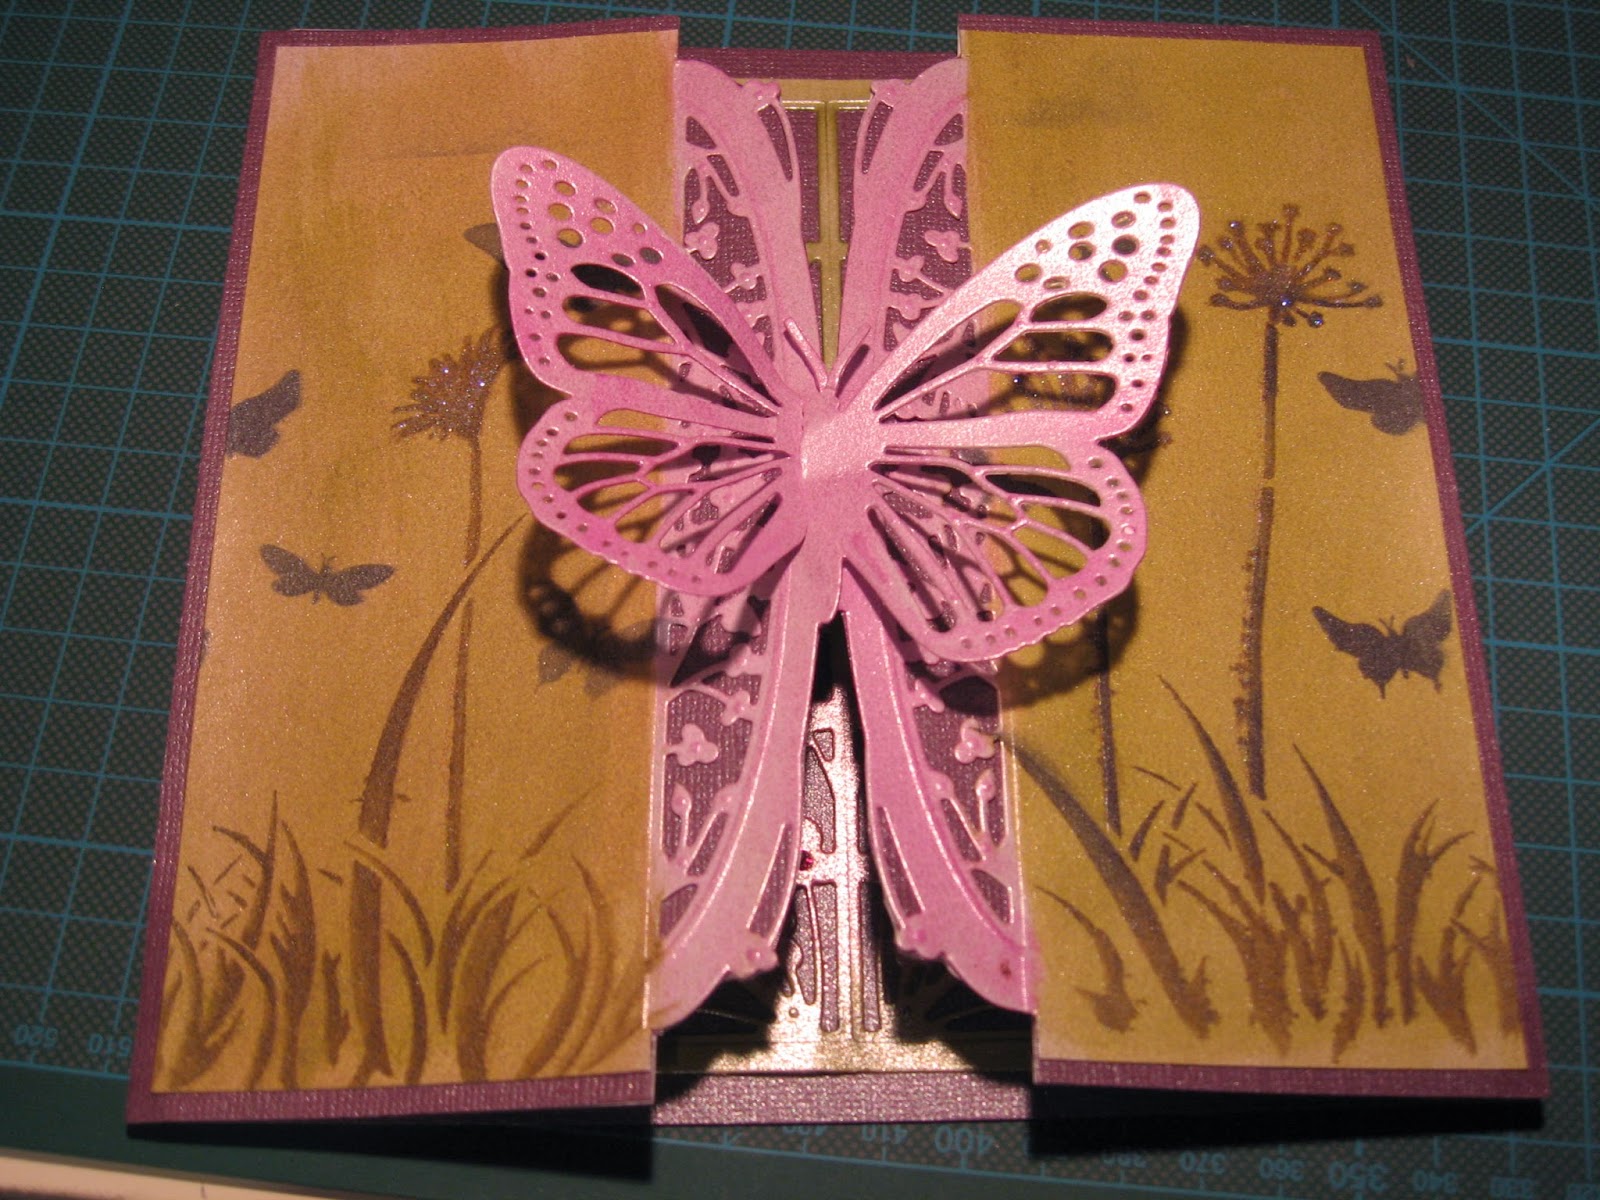
Here are the cards I have made over the weekend.  The first being a stepper card.


The second, an A5 card using my Spellbinders Die "Majestic Elements" and cut out the roses.


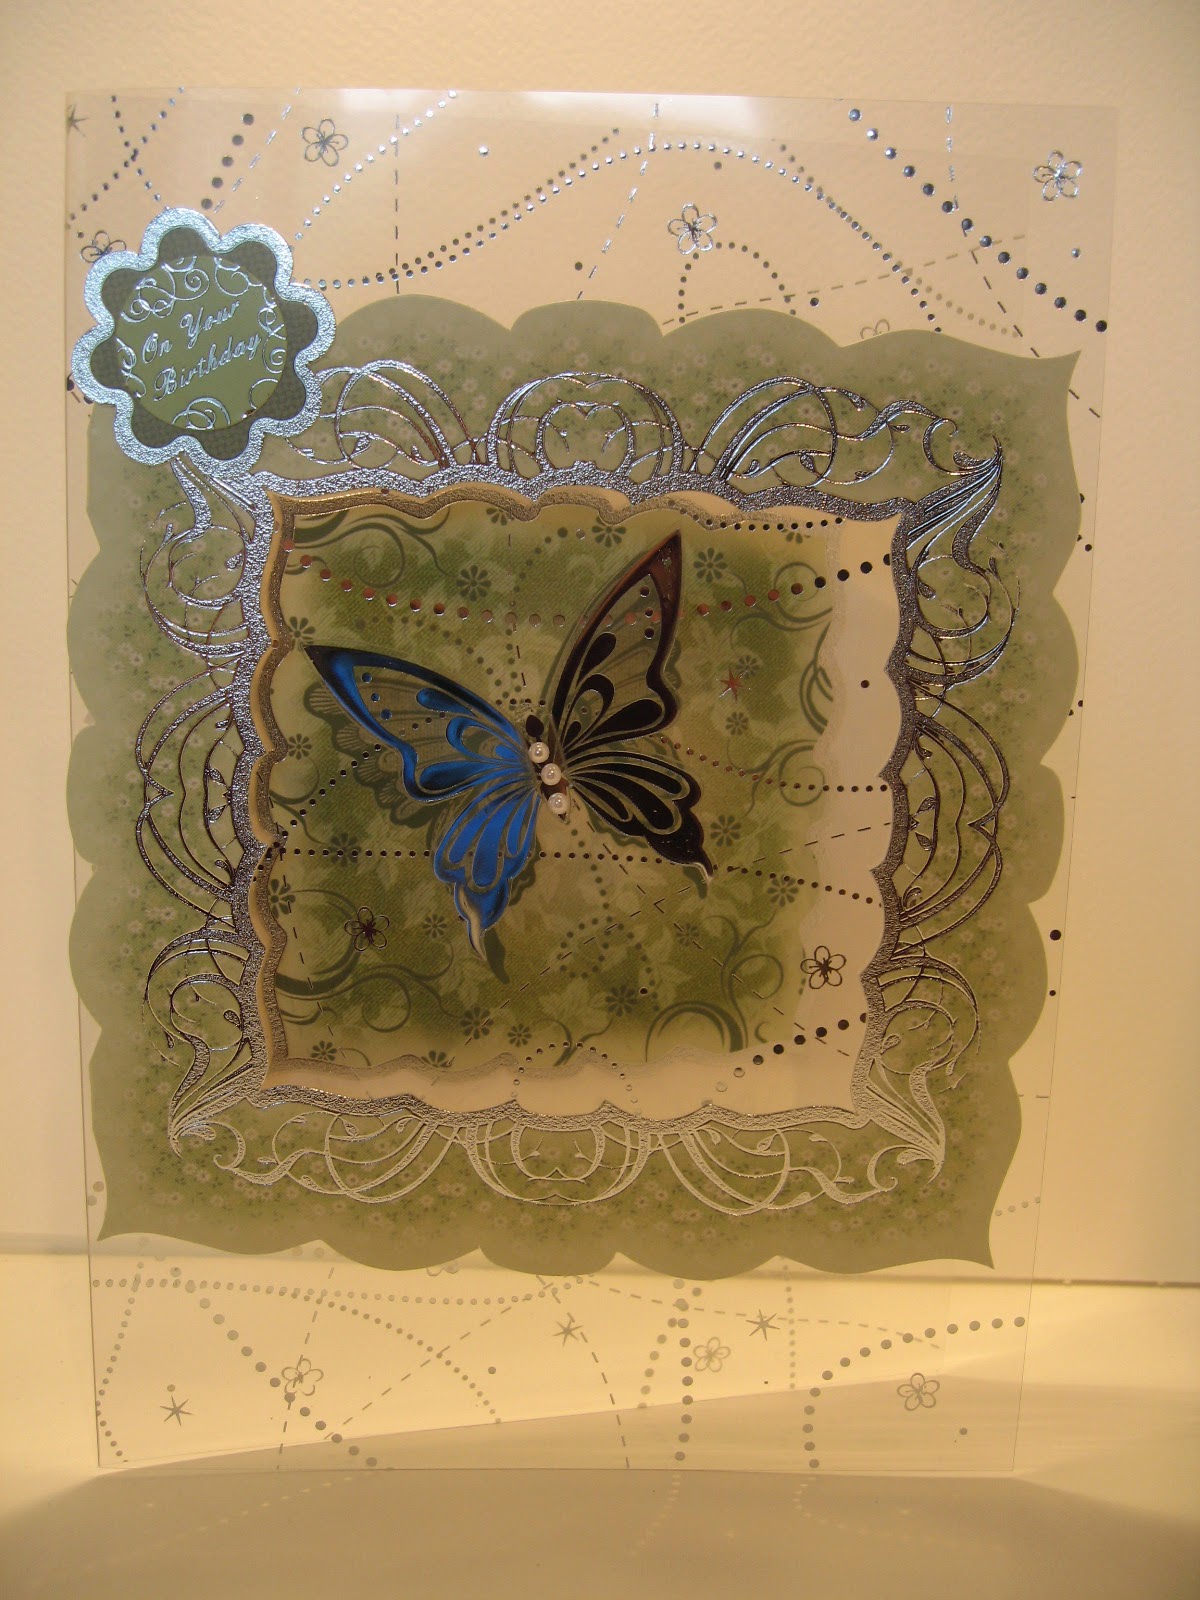
The third, I cut an aperture and put acetate behind.  Again, I cut out the flowers for the front of the card.


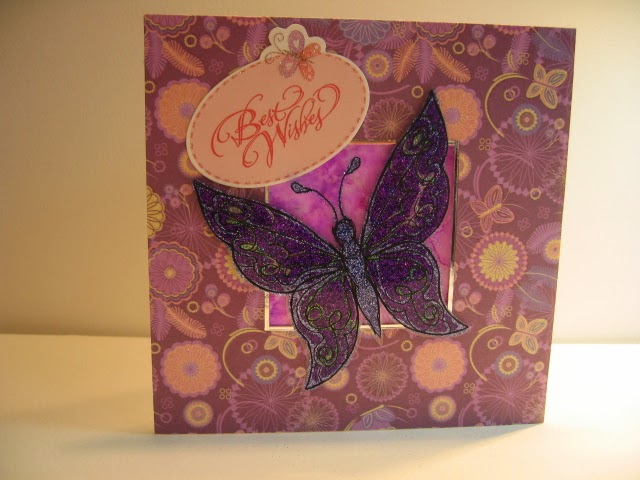
The fifth, I used a die by Tattered Lace.


The sixth is my favourite so far.  I used my new Tonic Trailing Blossom set die to frame the sentiment.


The card set came with some pre cut aperture cards so I embossed this 8x8" mirri card blank with an embossing folder with roses on which I found to match the inner liner of the card. 


The final card I made I also embossed the front, added an acetate window and fitted the card insert.  I may add some flowers to this once I have a bit more inspiration.


Saturday, 9 May 2015

Handmade Slippers

I have finally finished making some slippers. They were a bit of trial and error and have taken a while to complete.  I really wanted to make them in some needle cord but the material frayed terribly and I abandoned it and started again.

The slippers were made from a pair of old recycled jeans and some scraps of fabric that I really adore.  The pattern came from Debbie Shore's Spring Projects Hearts and Flowers Twin CD Set.  

Here is the final result and my husband is very pleased with them.


Saturday, 2 May 2015

Decorative White Tree Ideas


Decorative White Twig Tree 76 cm


I have this tree which came from Hobbycraft.  It was purchased with the intention of providing all year round interest by hanging different things on there according to the seasons.  At Easter I adorned it with hand decorated Easter Eggs and a crochet Easter chick and chicken and since then I have been busy making little bird houses to hang from the branches.

Here are the houses: 


I used a template of the bird house that came from the Hobby House Bird House Wreath Kit.  


When Christmas comes around again I have the option of hanging my handmade felt reindeers, gingerbread man etc or making some more houses but this time in red and white to create a nordic theme.   
 

Ten top tips for the Hobbycraft White Tree

  1. Hang themed and yummy treats from the branches at kids parties.
  2. Use it as a reward for the little ones to hang stars from when they're good!
  3. Craft the perfect centre piece to your wedding or baby shower and ask guests to hang wishes from the branches.
  4. Add festive treats for Halloween or Christmas.
  5. Make a unique advent calendar at Christmas.
  6. Peg family photographs - and make an actual family tree!
  7. Hang your dazzling jewellery collection from it.
  8. Deco mache words and hang their warmly-themed sentiments from the branches.
  9. Get messy with the kids! Make handprints and cut them out to use as leaves.
  10. Craft origami or quilled flowers from paper to prettily nestle among the branches.
  11. Wrap coloured wool around it to reflect the change in season or room theme.
Discover more great ideas  for your  White Tree on Pinterest

However you choose to decorate your tree, have fun!

Wednesday, 22 April 2015

Bags Galore!

Bags Galore is the name of a Project Twin CD rom set by Debbie Shore which I purchased with the intention of getting more out of my sewing machine.  The CD Rom comes with instructions, patterns and most importantly 10 step-by-step video tutorials.  

I have been holding onto some lovely fabrics and zips for some while now waiting for such an opportunity as this so I didn't hesitate to purchase this CD Rom when it was on special offer.

My bag was constructed slightly differently to the instructions in that I made use of the frilly zip which has become a feature by installing it on top of the opening seams.  I wasn't sure how it would pan out and and how I would deal with the ends. However, I managed to tuck and hide these as I machined the final seams before turning the bag inside out.  I have more fabric so will try this again soon and then post my photos below to share with you.

Let us know what you think of my efforts.

Anyone interested in purchasing frilly zips try this website. Although I didn't get mine from here, they have quite a selection of nice colours and I spoke to a very helpful lady.  The size I used was a  9" (25cm) and this fitted extremely well.  If you buy larger, apparently you can trim the ends.

Crafty hugs from Crafty Tashx


Now that I have made a couple more, I am posting pictures of these as well.


Thursday, 9 April 2015

Easter Amigurumi


I am back crocheting again and this is my latest project, sweet little Easter chicks.  I had planned to make baby chicks in a multitude of colours prior to Easter but ran out of time so this is as far as I got.

The patterns came from this book which is available to buy from Amazon's website at £3.25.
  

I like the look of these Christmas ones too!

Enjoy!

Crafty Tash

Sunday, 29 March 2015

Craftwork Cards - Fab Fabric

I have had a fab week making cards using a papercrafting kit from Craftwork Cards called Fab Fabric.  Currently only available to crafters on the Create and Craft show I picked up this kit for £20.  This was the the four day deal price and it has now gone up to £35.  So the question you may be asking yourselves is does this represent good value for money. Undoubtedly I reply as you can make a minimum of 40 cards which I already have done and still have the potential to make quite a few more.  I can certainly see a profit in this kit.

The papercrafting kit comes with an A4 paper pad which is the first for Craftwork Cards.  Usually their pads are 8x8. There were also some pre cut cards shaped into cotton reels and sewing machines as well as lots of die cuts and toppers with butterflies, Scottie and Sausage dogs, buttons, cotton reels etc and templates to make dresses,

Here are a few of my favourite cards I have made.  The rest I have uploaded to my Pinterest page.  Which you can see here.  

I would like to end this post by saying I think this is the most fun I have had in making cards from a papercrafting kit in a while and hope you get as much enjoyment out of it as I have.

Crafty hugs from Crafty Tash


I used a Tattered Lace die here to tie the topper and sentiment together.  A small amount of gel glue gives the bird some shape rather than laying flat on the card.

Here is one of the cotton reel cards.   They are great fun to decorate. I have cut lengthwise 2cm strips from the paper pad, five in total and edged them with some Stickles glitter glue.  Once dried I have glued these all the way around the reel so the inside of the card looks as neat as the front.
Here is one of the sausage dog toppers, so cute.  For this card to stand out I trimmed the front edge slightly shorter so that when it closed it fitted neatly against the edging strip that I adhered to the inside of the card.  You can just see this (red with scallop edge).  Embossing the card first gave it some focus.  An idea I copied was to add another heart to the topper, one that was slightly larger which I covered in a product that leaves a glaze finish.
I have made a dress to fit my manekin.  I wanted to add a feel of depth to the dress so I cut two and layered it in a way that created folds of card (like material).  A card template for creating patchwork fabric was used to make this quilting effect.
This card required a bit of thought.  The background paper was really pretty but I didn't feel as if the topper elements would work that well with it so I decided to try something different.  I used my watering can die from Tattered Lace and then fussy cut all the little flowers from the background of the paper and stuck them on.  Genius!

Saturday, 21 March 2015

Decorating MDF Chicken, Sheep and Bunnies

Well I promised more home decor and it didn't take me long to deliver did it!

This week my project has been all about decorating mdf animals and I can tell you it has been great fun.  My favourite by far are the chickens but I love my bunny too.

I have made one or two of these as Easter gifts so I am very eggcited about this.  The wooden shapes were very reasonably purchased from Inky Doodles and I have used by Woodcraft Marker sets and some distress inks to paint and decorate them.    They bells are a neat way of creating feet for the chickens.   


and now for some sheep!  Now I am looking at their photos I think I will add some ribbon to this black and white one, to gift it more of a lift.


When I did the feet on this first one I wasn't quite sure how I wanted to finish them off.  Tying a knot made the legs splay out and I didn't much care for that so on the second sheep I tried something different.  I folded the twine in half and pushed it through the purpose made hole and then threaded the ends back through the loop I had created.  This not only solved the problem but I preferred the look.  I also glued the pairs of feet together and that stops them turning around.  


and on to my bunny.  I have made two of these.  I liked the idea of faux stitching so I copied this but came up with my own idea for the necklace using some plastic beads from the Hobby House.  The paint is a matt chalk paint from Cosmic Shimmer.


A big thanks to Sarah from Inky Doodles for inspiring me to get creative.  It has been good fun and now I am off to add more ribbon to my sheep.

Saturday, 14 March 2015

Mariposa

Mariposa is a great name to describe butterflies in French. Butterflies are enjoyed for their beauty and elegance and it is no wonder that us crafters enjoying using them in our card making. 

I have made a few cards over the last week which I would like to share with you using my butterfly dies.

The first card is from my Mariposa die collection which is only available through the Create and Craft shopping channel.
I put the card through my embossing machine to create the embossed background.  The embossing folder is one from Tattered Lace and is covered in small butterflies.  Tattered Lace are my preferred brand for embossing folders as they seem to get the scale just right for my card making.  I have then rubbed Adirondack Ink over the surface in two shades of ink to create some interest to the background.  The Mariposa dies were cut to create the background and the foreground.  I used some clear acetate behind the wings and glittered them.  I was very really pleased with the result.


On this next card I have used the same dies but created something quite different.  This card has a concertina fold at the bottom and the sentiment is at the back of the card.  I used a deep mauve corrugated card for the background to enable the front of the card to stand out.    This time I didn't fill in the the area behind the wings and left it so that you can see the pattern I created behind the wings.  I coloured the cardstock with my Distress Ink and decorated it with Stickles glitter.


This next card was made again using the Couture Mariposa Die Collection using the closure die.  These dies when cut interlock together to form a closure like no other.  I used a stencil for the background and decorated the inside of the card using another die.


On this next card I used my Die'sire Die which I ran through my embossing machine using Foundations Milk Card. It is high quality card stock available from Joanna Sheen's website.  It is lovely the way the wings lift from the card.  The background is in Sky Blue, again Foundations Card stock (220gsm).  I am not sure it needs anything more added.  There is scope to make this in a variety of different backgrounds.


 The idea for this card came together very quickly once I had decided to work with my die from Tonic's Indulgence range "Sending a Big Hug".  These are really useful dies as there are two halves to them giving you the opportunity to use them in different ways.  As you can see from this card I have used the one half to cut out the swirling pattern on the right-hand side but left the left-side filled in.    

The paper used came from my paper pad from Melissa Frances called c'est la vie.  It has lovely soft vintage tonal patterns.  

I have a beautiful butterfly metal stencil from Sweet Poppy Stencils which I used to create the focal point on this card.  I used Sparkling medium over the acetate.  The pins were handmade using stick pins and beads now available through Creative Expressions.

The flower was created using a Chloe flower stamp which I used with white embossing powder.


Here are some older cards I have made using a kit from Hunkydory and acetate.


Followed by a few made with mixed media.  I have used glitter onto acetate for the butterflies and inks to create backgrounds on acetate.


 This butterfly was made using Angelina fibres.  This technique is great and one that Barbara Grey showed us.


This is a lovely large butterfly stamp I have from Sheena Douglass.


and finally, an Imagination Craft stencil and lots of Sparkling medium were used to create this card  The sparkling medium was used onto acetate and mirri card sits behind it.


This concludes my range of butterfly cards I have made over the years, I hope you enjoyed viewing them.

Crafty hugs from Crafty Tash

Sunday, 8 March 2015

Making paper Flowers for cards

There are many ways of decorating cards with flowers.  If you want them to match perfectly with your own colour scheme then you can't beat making your own.  These can be made from stamps, dies or punches.  

With punches you can make almost any type of flower and today I had a go at making a crocus and a hydrangea.


I used a punch that looked like a "pear" and cut out 7 pieces for the flower.  The first was rolled tightly around a cocktail stick that was coloured green.  I then shaped and rolled the remaining petals around the stem.  Finally, I added some green stems for the leaves .

My biggest challenge was making a hydrangea flower head.  The small flower punches only worked with paper so I coloured the paper with ink.  I then used a ball tool to shape them.  Next I cut a polystyrene egg in half and started working from the centre outwards by glueing the flowers in place.  


I finished the centre of each flower with some glitter glue.

Here are a few others I have made.


Little roses


Clematis flowers
Red poppies
And finally some lovely fern leaves

Sunday, 1 March 2015

Home Decor Projects

Craft projects made from mdf are trending at the moment and there has been no shortage of shapes to purchase and decorate for any season of the year.

For example you only have to take a look at Sarah's Facebook page from Inky Doodles and you will see some Christmas ideas on using mdf to make bunting out of pre-cut mdf gingerbread men.  My favourites are her Rufus Reindeer and Rocking Robin. I would definitely like to make these, they are so adorable!

Keeping within season, Sarah has designed some fantastic chickens, bunnies and sheep as well as her Spring Animal Collection which I purchased with the aim of making some Easter Bunting.


I have collected a few pieces of mdf with a view to decorating them but until this weekend, hadn't really got going with them.

Here is another project that I have made that cost just slightly over £2.  It just needs a couple of holes so it can be hung and then it is finished.


Now I have got going the ideas are forming and I am looking forward to making some more and when I do, I will keep you posted.

If you interested in making your own decorations also take a look at this website for more ideas www.artcuts.co.uk .  Here you will find lots of inspiration and wooden shapes to purchase and decorate.

Crafty hugs, from Crafty Tash